How Knitting Works
Learn the basic overview of how knitting works before you dive in to your project.
Adapted from How to Knit Lesson Four. Get the complete tutorial at the link below.

Learn the basic overview of how knitting works before you dive in to your project.
Adapted from How to Knit Lesson Four. Get the complete tutorial at the link below.
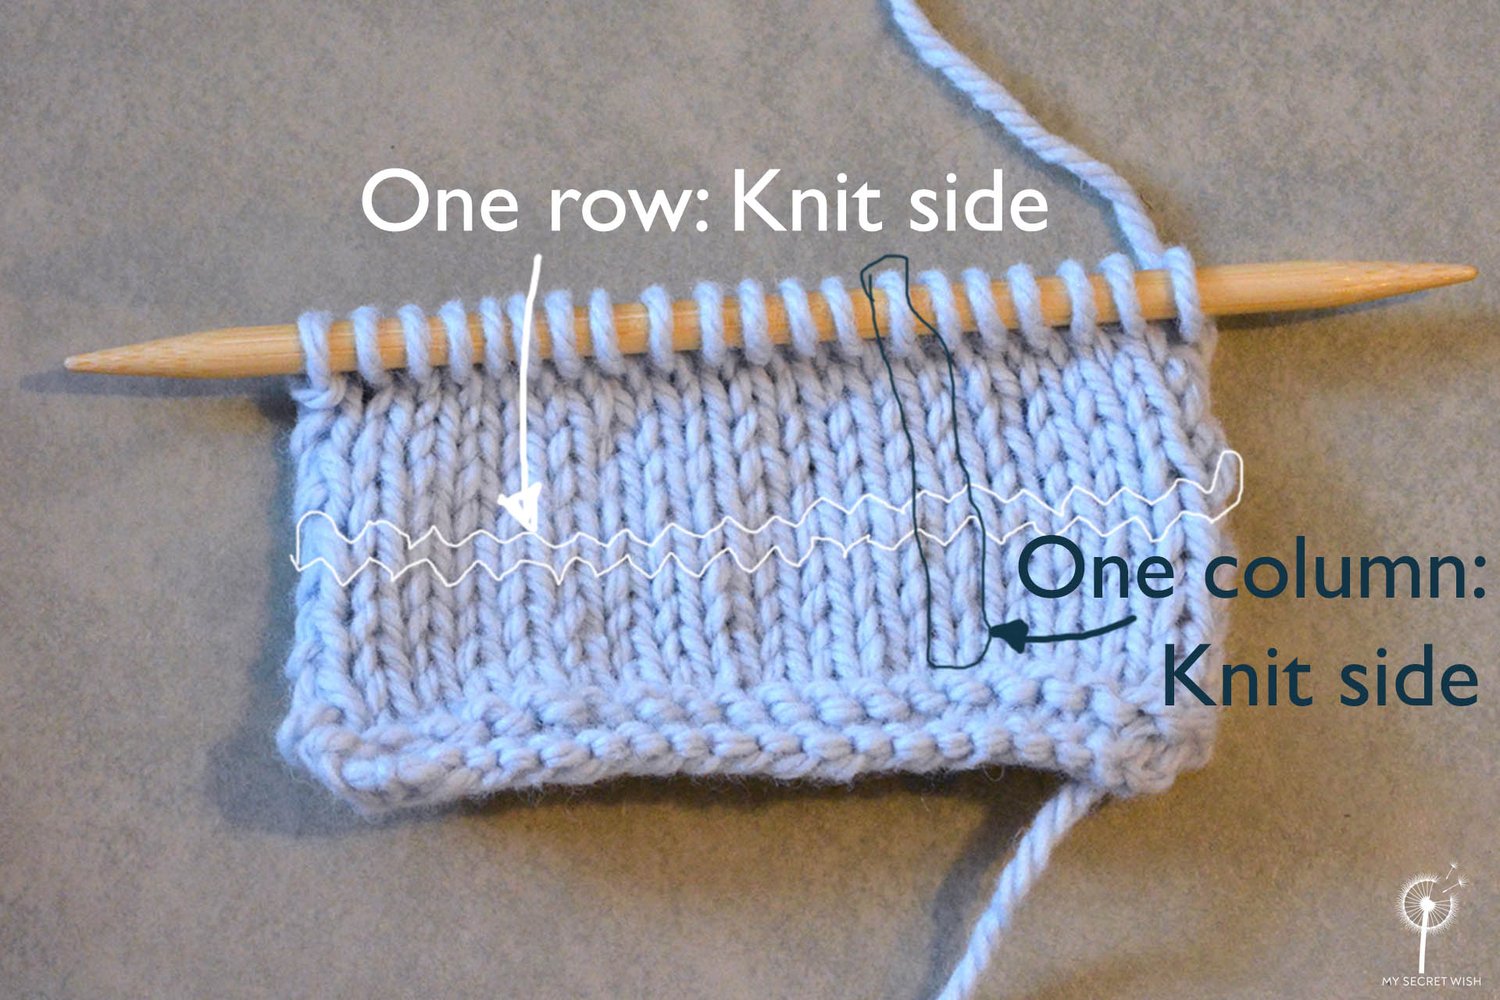
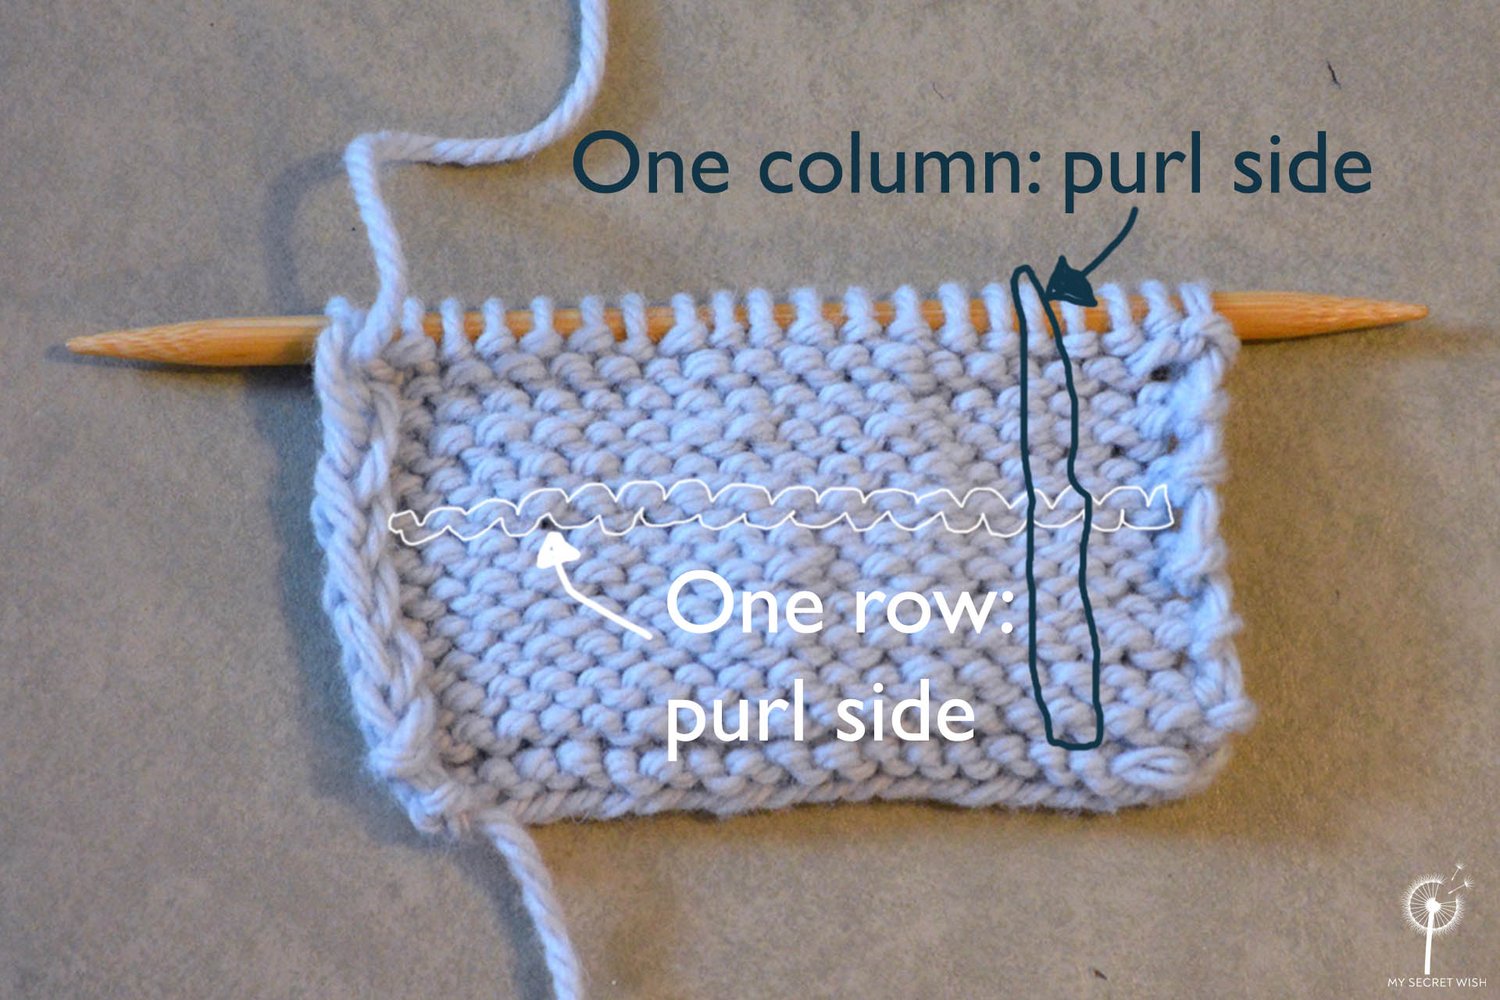
Knit fabric is a series of interconnected loops which we create in rows, but which appear to be connected in columns. Each column of stitches is built up row by row from starter stitches that are created by casting on.
Since I’m right-handed, all of my tutorials show only positions for righties, but the instructions are given with the non-hand-specific terms of working needle (the needle in your dominant hand that you’re working onto) and non-working needle (the needle in your non-dominant hand holding existing stitches that you’re working into to create new stitches). If you’re a lefty and want to see what the hand position should be, hold either your hands or the tutorial image in front of a mirror to duplicate what you see.
Rows and columns on the knit side.
Rows and columns on the purl side.
Cast on stitches using Knit Cast On.
Before we move on, I need to clarify what it means to knit in Continental or American Style.
Simply put, these styles refer to the hand you prefer to hold your working yarn in.
If you’re more comfortable using your dominant hand to both hold the working needle and manipulate the yarn, then you’ll want to learn the American-style tutorials.
If you want both your hands to work in tandem so your non-dominant hand can get in on the action, learn the Continental-style tutorials.
I get into more detail in “Holding the Yarn”. However, if you’ve never knit before, I recommend trying the Continental-style tutorials first. While a little trickier to learn, once mastered, this style of knitting is much more efficient and easier on your joints. But if it’s only frustrating you, switch to the American-style tutorials. You can always try Continental again once you have the basics down—or quite happily knit American-style your entire life without any reason to switch.
Unless otherwise stated, my images show a right-handed person working in Continental style.
You've got your yarn. You've got your needles. You've probably nabbed a few nifty knitting notions. Now what?
As your very first project, I recommend making a gauge swatch.
BUT FIRST:
In order to make a gauge swatch (or any knitting project at all), you’ll need to know how to cast on, knit, purl, and bind off. And in order to do that, you’ll need to know how to hold your yarn—which is the key determining factor for your style of knitting. (This isn’t a high-pressure choice. As I said earlier, try Continental first. If you can’t get the hang of it, switch to American.)
In the next lesson, I'll teach you how to hold your yarn. In the following lessons, we’ll talk about casting on, knit stitch, and purl stitch. Then we’ll bring it all together to make your very first knitting project—a gauge swatch. After that, I’ll show you how to bind it off and finish it properly.
Ready? Let’s go!
Return to How to Knit index:

Hi! I’m Talena Winters (a.k.a. the Yarn Mermaid).
I started My Secret Wish Knitting in 2010 to empower and delight knitting heroes like you who want to elevate your knitting and make magic with yarn. When I’m not concocting new yarn potion recipes, I’m creating story magic as a fantasy and romance author and fiction editor (at talenawinters.com). I live with my family and pets in the Peace Country of northern Alberta, Canada, where sweater weather lasts at least nine months a year and my closest neighbours are bears and wood nymphs.
This website is a labour of love by a team of one (me!). If you found value here, please support the effort by purchasing a pattern. If you want more knitting magic, check out my community events and newsletter in the Knitting Circle. We’d love to have you!


