Make a Slip Knot
The first step for many popular cast ons.
Making a slip knot is super easy. If you have made it correctly, the knot can be tightened by pulling on the ball end of the yarn.

The first step for many popular cast ons.
Making a slip knot is super easy. If you have made it correctly, the knot can be tightened by pulling on the ball end of the yarn.
Basic Principle:
You’ll be creating a knot that slides easily along the yarn to create a resizable loop.
Text included in the images is written out below each step to make this Low Vision Accessible. Instructions on the images are for right-handed people. Instructions in the written text is non-hand specific.
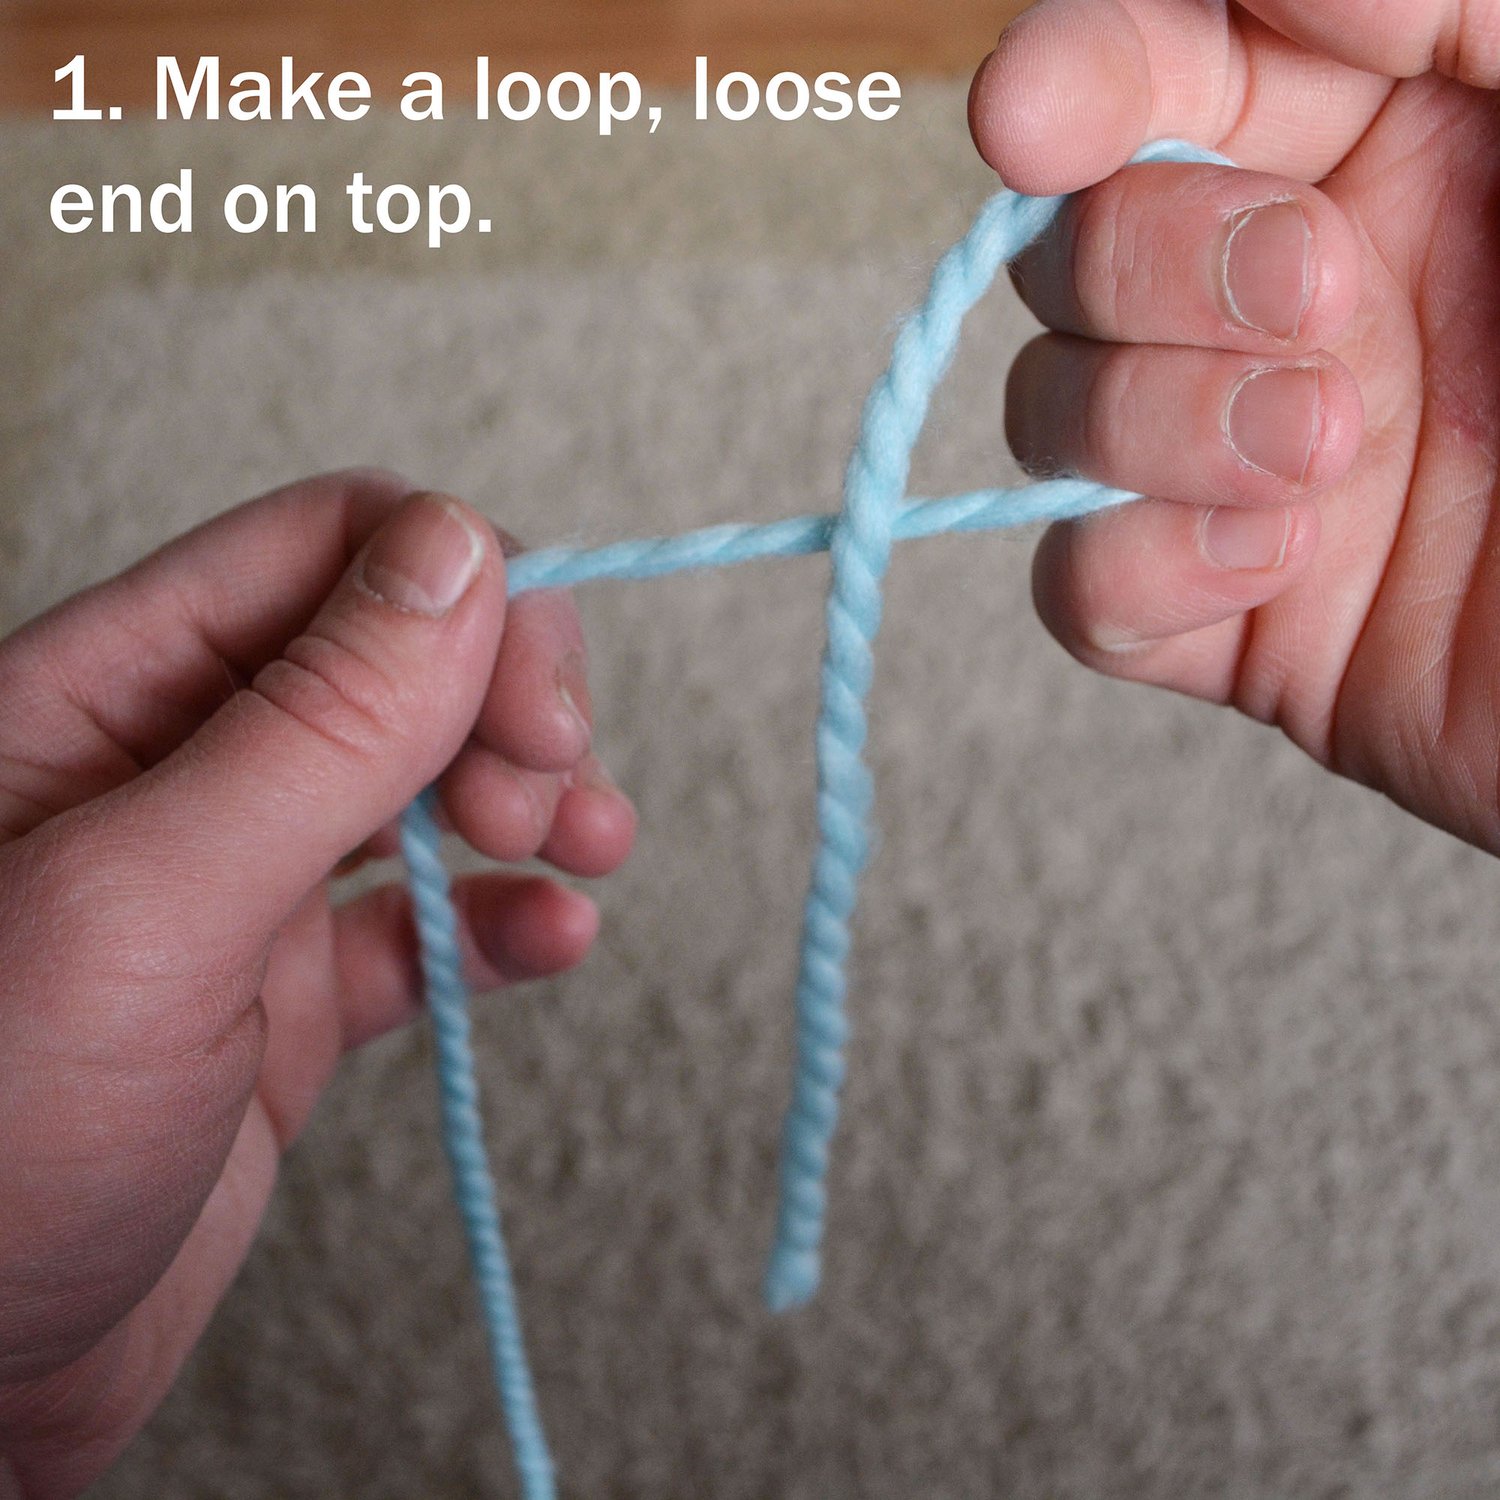
Holding the ball end of the yarn in your non-dominant hand, use the dominant hand to twist the yarn into a loop with the loose end on top.
The yarn should not be twisted around itself. There will be a simple circle with the loose end of the yarn laying on top of the ball end of the yarn.
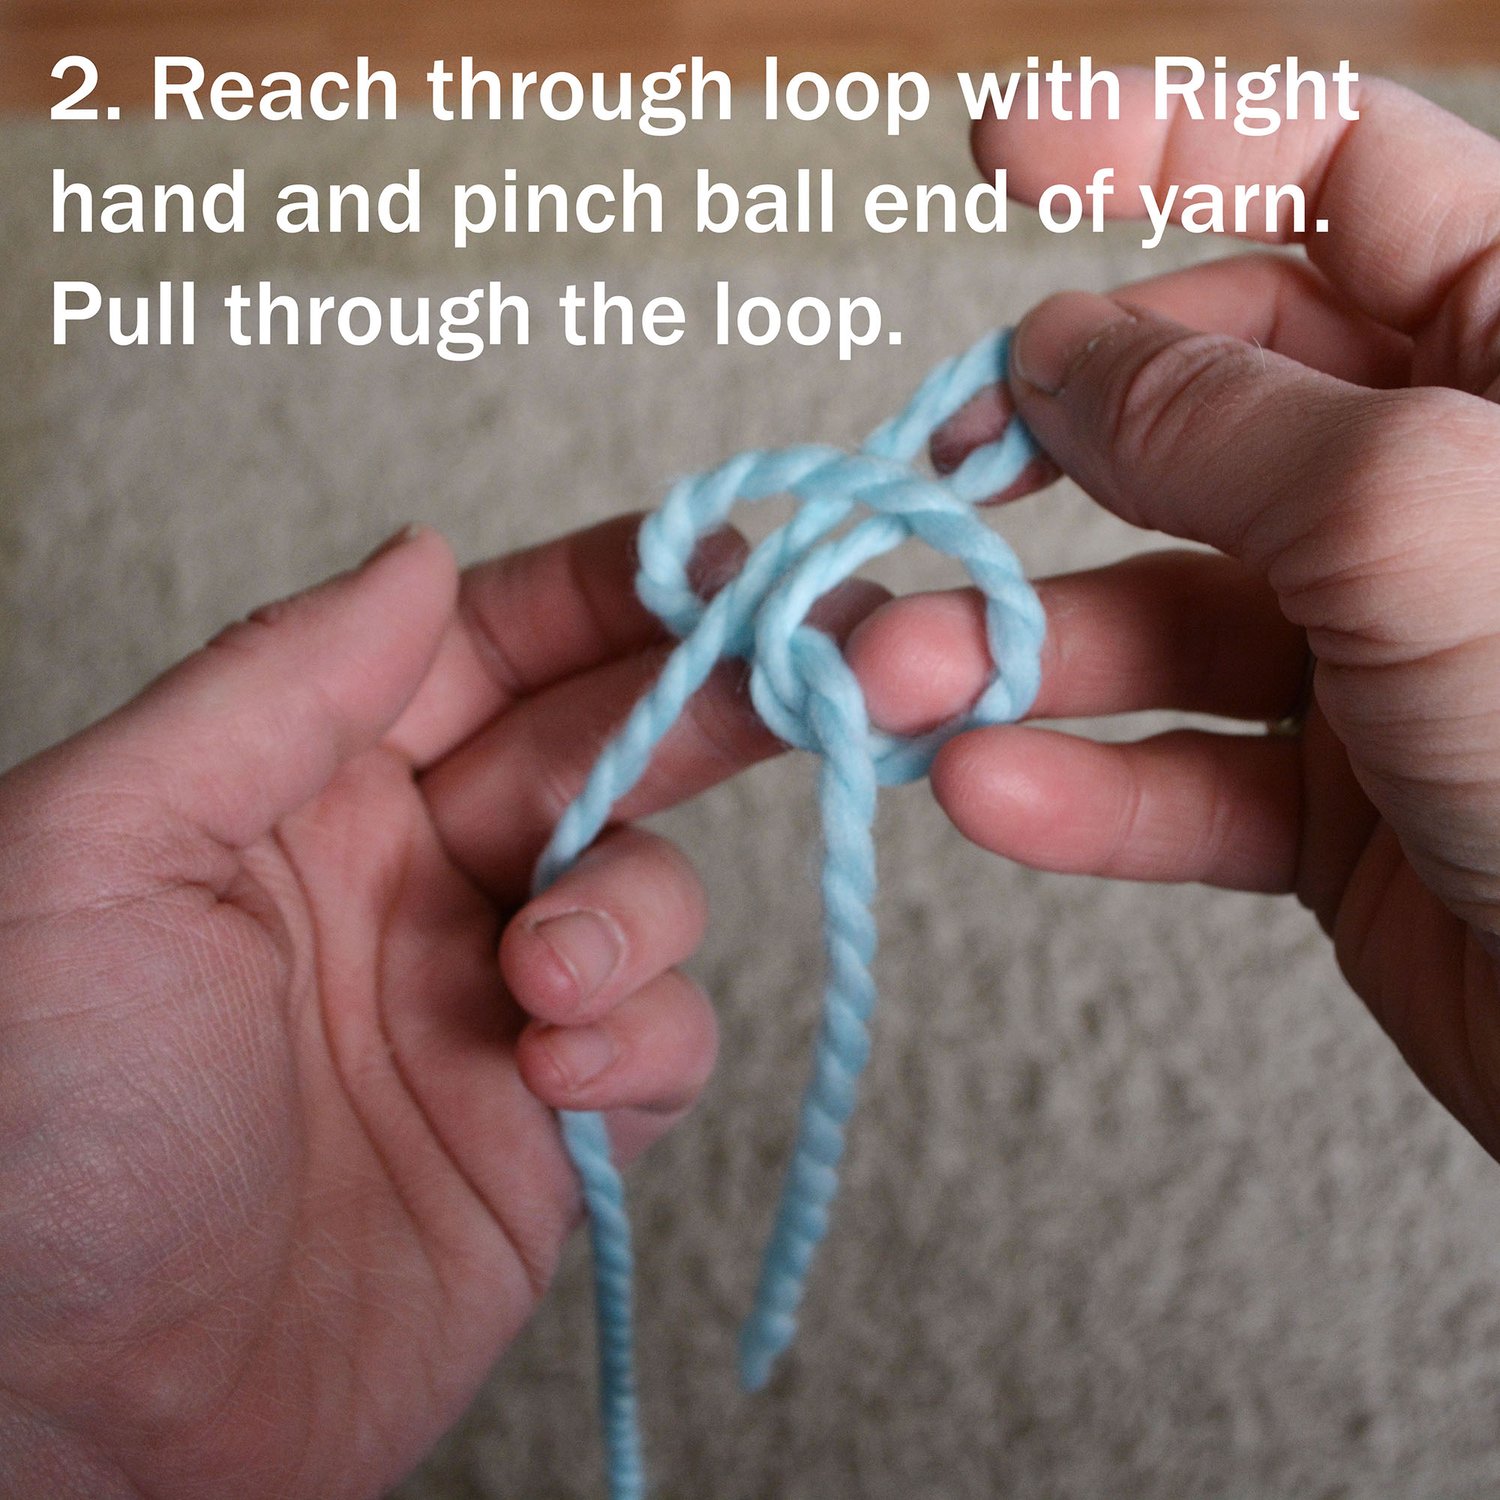
Reach through the loop with the thumb and forefinger of your dominant hand and pinch the ball end of the yarn. Pull the pinched section through the loop.
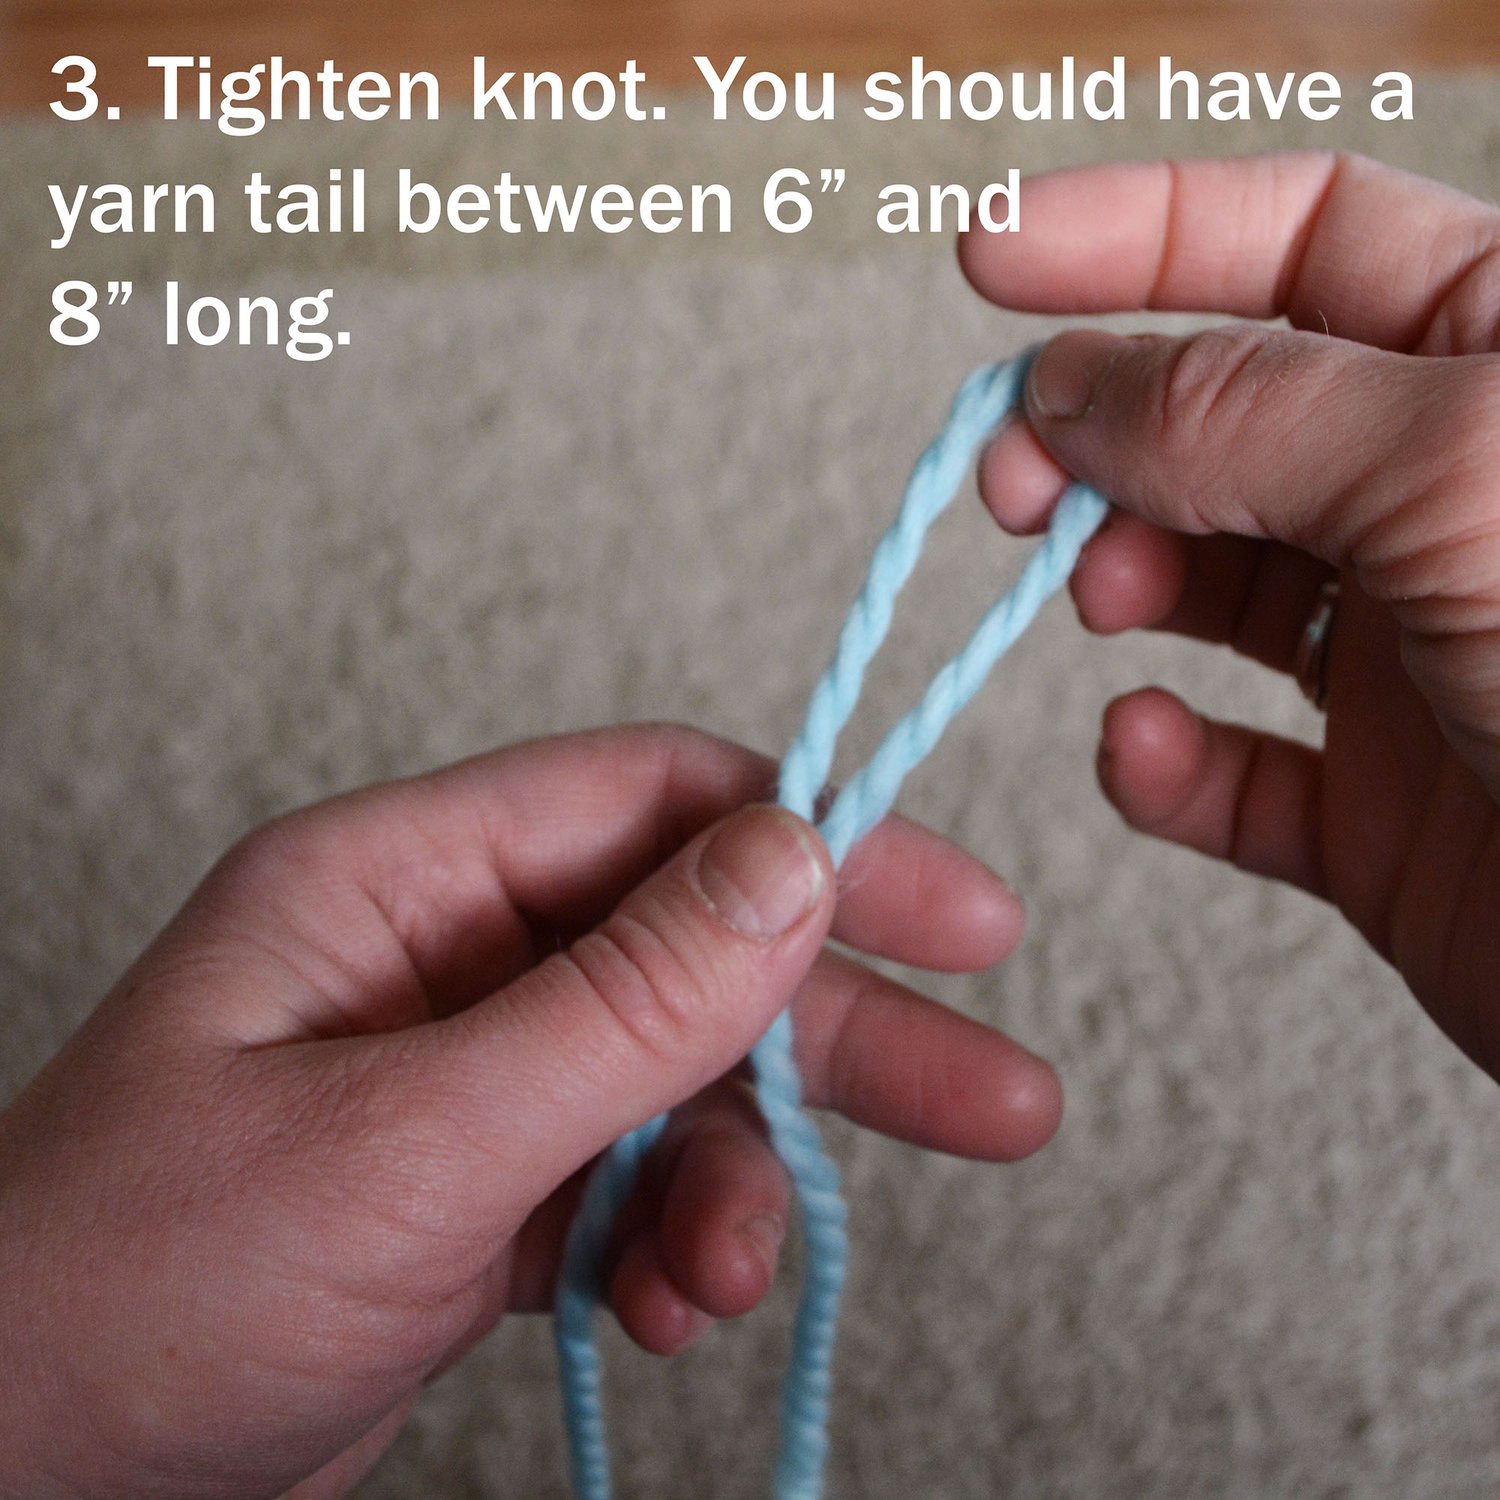
Tighten the loop into a knot by tugging on the two yarn ends with your non-dominant hand, leaving a yarn tail between six inches and eight inches (15 and 20 cm) long.
If you find tugging on both ends leaves a tail that’s too short, only tug on the ball end of the yarn.
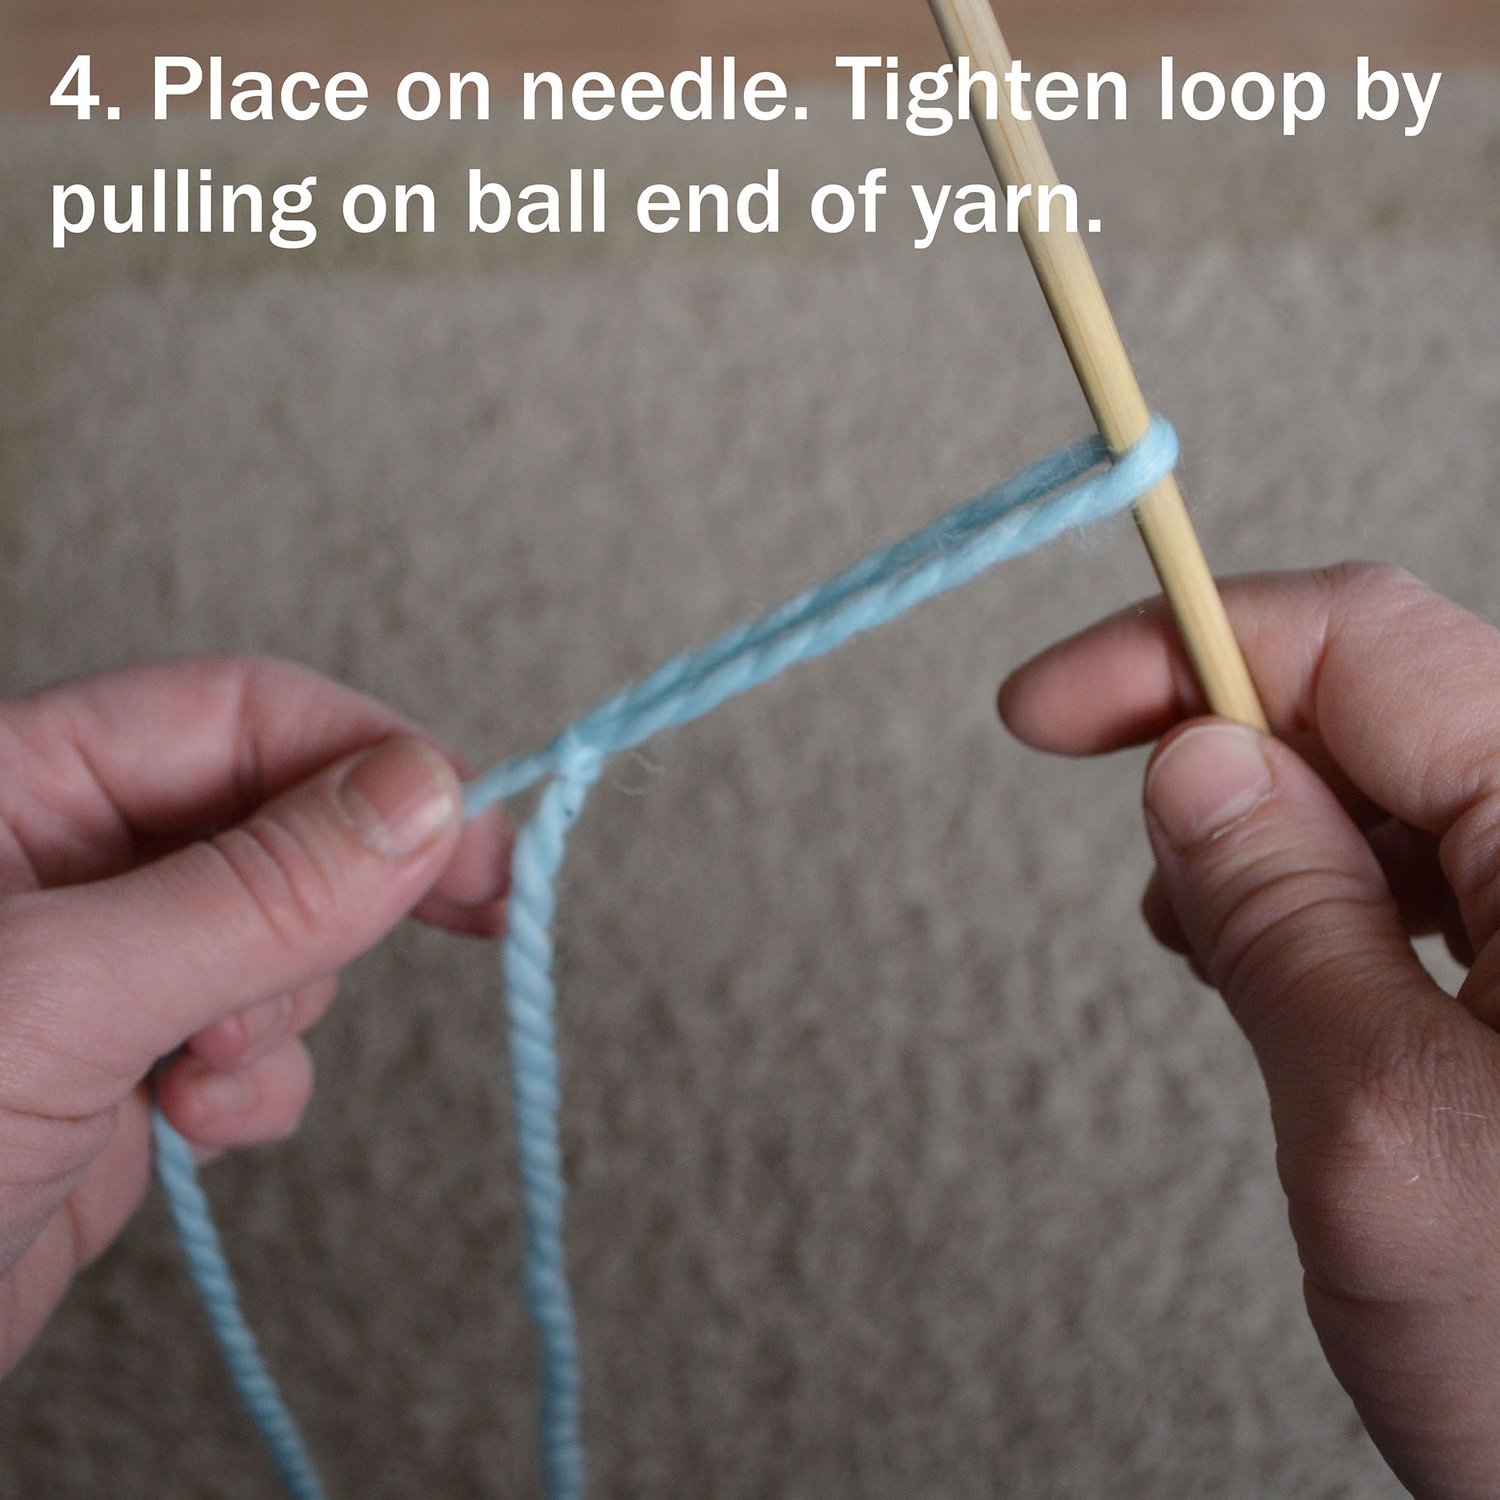
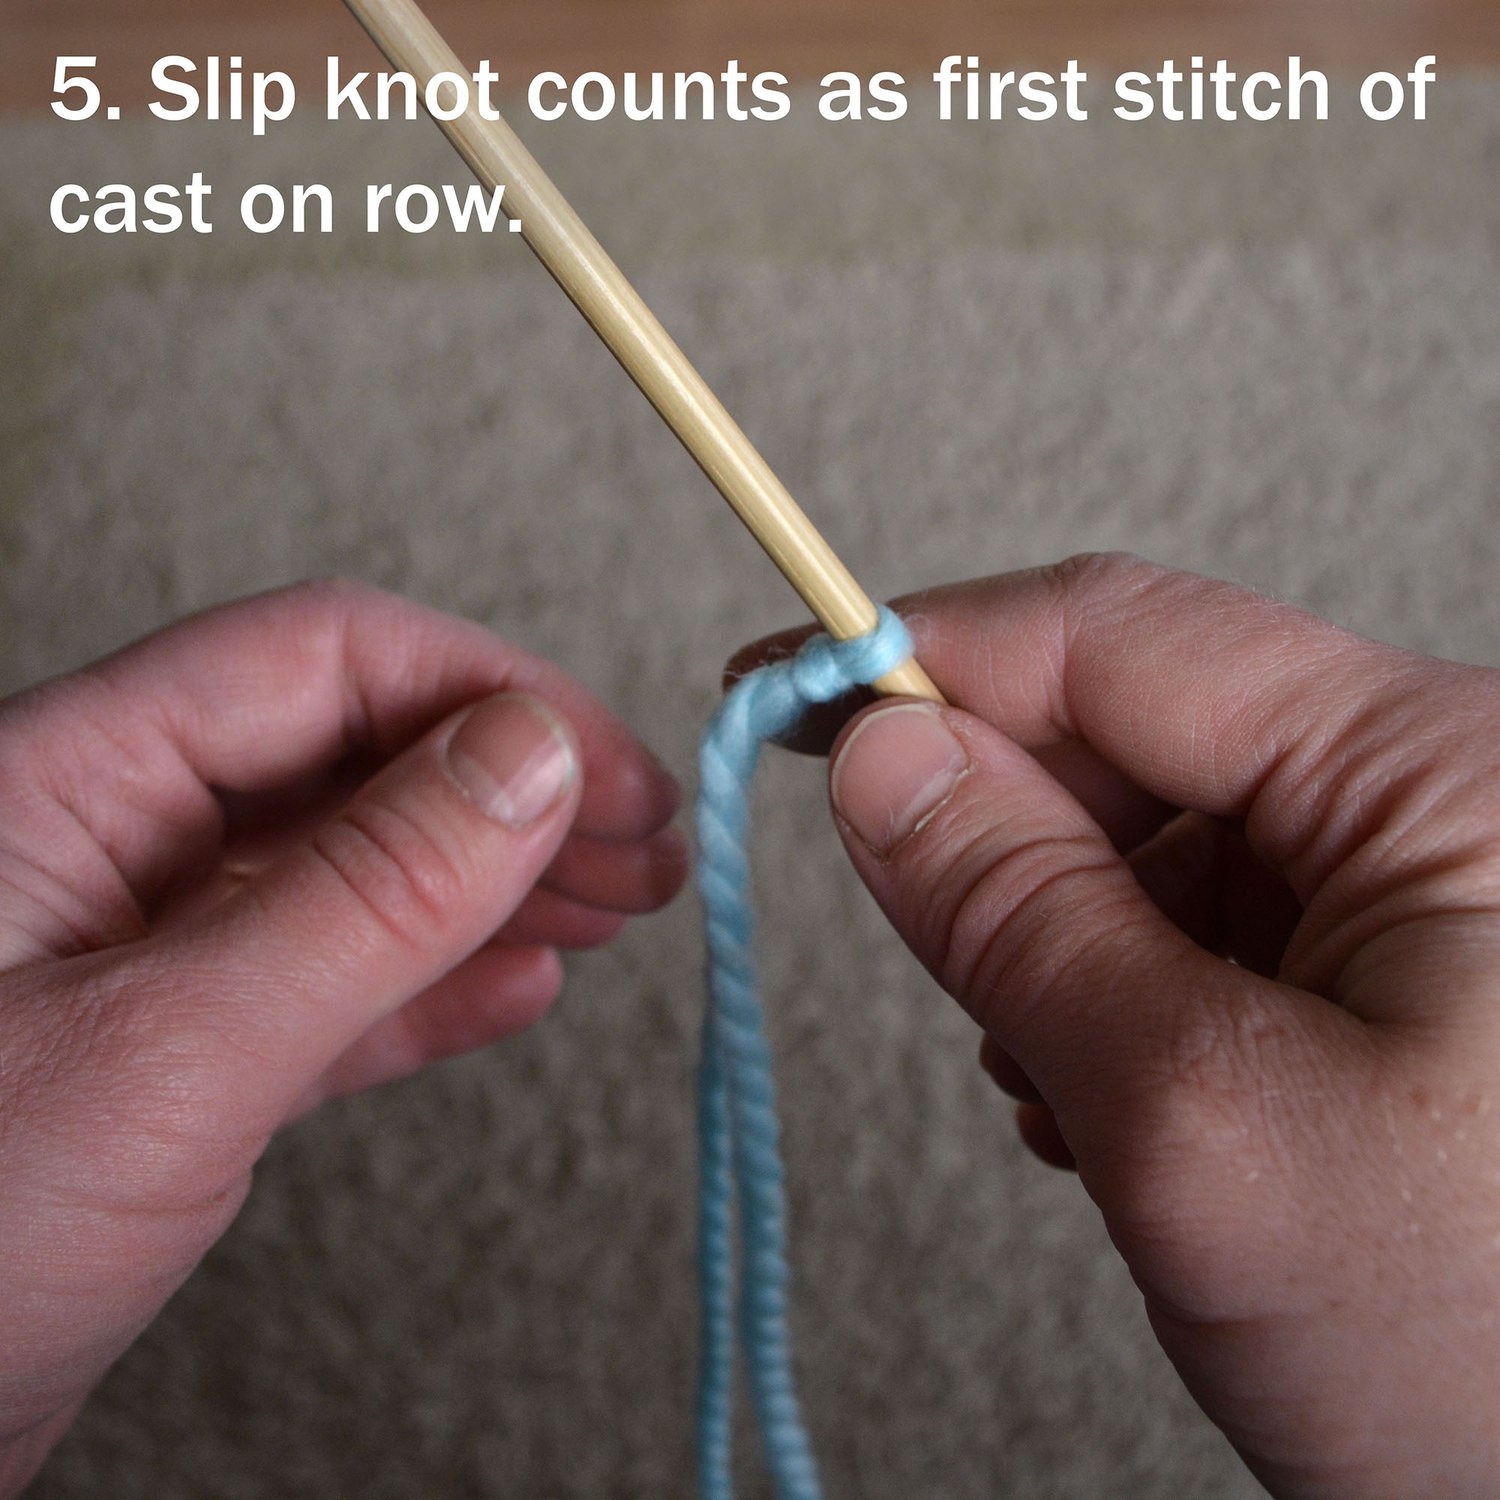
Place the loop on a needle. Pull on the ball end of the yarn to tighten the loop, but be sure not to overtighten.
Your slip knot is complete! In most cast ons, it counts as the first stitch of your cast on row.
If you’re working through the How to Knit tutorial, return to the main index here:
Hi! I’m Talena Winters (a.k.a. the Yarn Mermaid).
I started My Secret Wish Knitting in 2010 to empower and delight knitting heroes like you who want to elevate your knitting and make magic with yarn. When I’m not concocting new yarn potion recipes, I’m creating story magic as a fantasy and romance author and fiction editor (at talenawinters.com). I live with my family and pets in the Peace Country of northern Alberta, Canada, where sweater weather lasts at least nine months a year and my closest neighbours are bears and wood nymphs.
This website is a labour of love by a team of one (me!). If you found value here, please support the effort by purchasing a pattern. If you want more knitting magic, check out my community events and newsletter in the Knitting Circle. We’d love to have you!