Provisional Cast On

For when you want to knit both directions.

The Provisional Cast On is a magical technique for creating an edge that can be released to pick up live stitches later. It’s ideal for when you want to knit in the opposite direction of your original stitches or you need to seamlessly graft your ends to make a loop—for instance, to create a cowl or a hatband. It's also handy for crafting elegant hems on sweaters. Learn how with this easy tutorial!

Pros:

  • Allows you to knit in both directions from a cast-on edge.

  • Can be used to create rolled hems or centre-back-seam shawls and shrugs.

  • Can be used to create closed loops like cowls or hat bands (and joined with the live stitches on the “top” of the work with Kitchener Stitch).

Cons:

  • You need to use a crochet hook to do it.

  • You need to remember which way to wrap your yarn around the needle while creating it.

  • Can be difficult to release scrap yarn from cast-on edges that mix knits and purls.

In this tutorial, learn how to create a crocheted provisional cast on in order to be able to knit from the top and the bottom of your work.
Twisted Rope Fingerless Mittens
Quick View
Twisted Rope Fingerless Mittens
CA$9.00
 
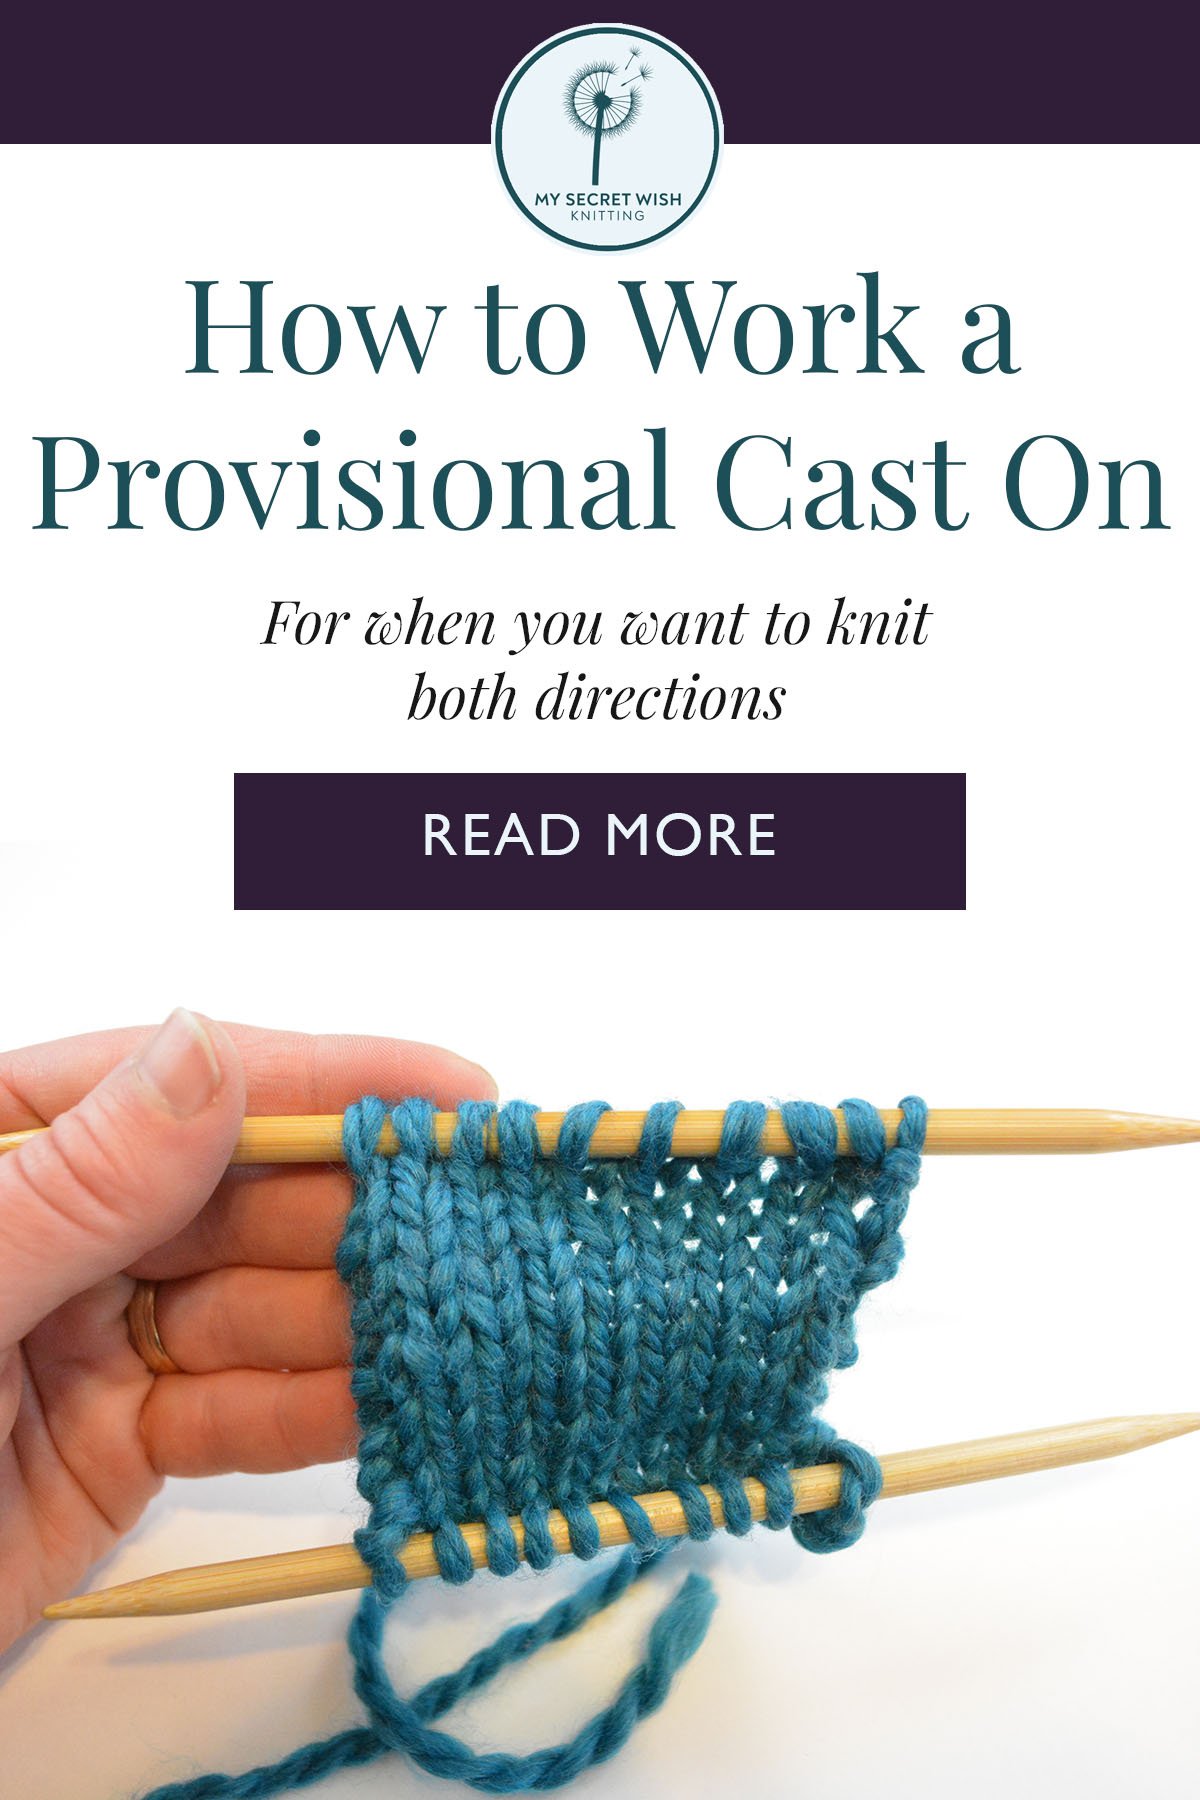
Text: How to Work a Provisional Cast On - For when you want to knit both directions. READ MORE. Image: A small swatch with double-pointed needles through live stitches on the top and bottom. Logo: My Secret Wish Knitting
 

How to do it:

Text included in the images is written out below each step to make this Low Vision Accessible. Instructions on the images are for right-handed people. Instructions in the written text is non-hand specific.


Basic Principle:

You will be making a crochet chain with scrap yarn around your knitting needle for your cast on stitches, which will be unravelled later when you are ready to put your stitches back on your knitting needle to work. Using a contrasting colour in the same weight of yarn or slightly lighter-weight as your project yarn works best.


Provisional Cast On Step One

Step One:

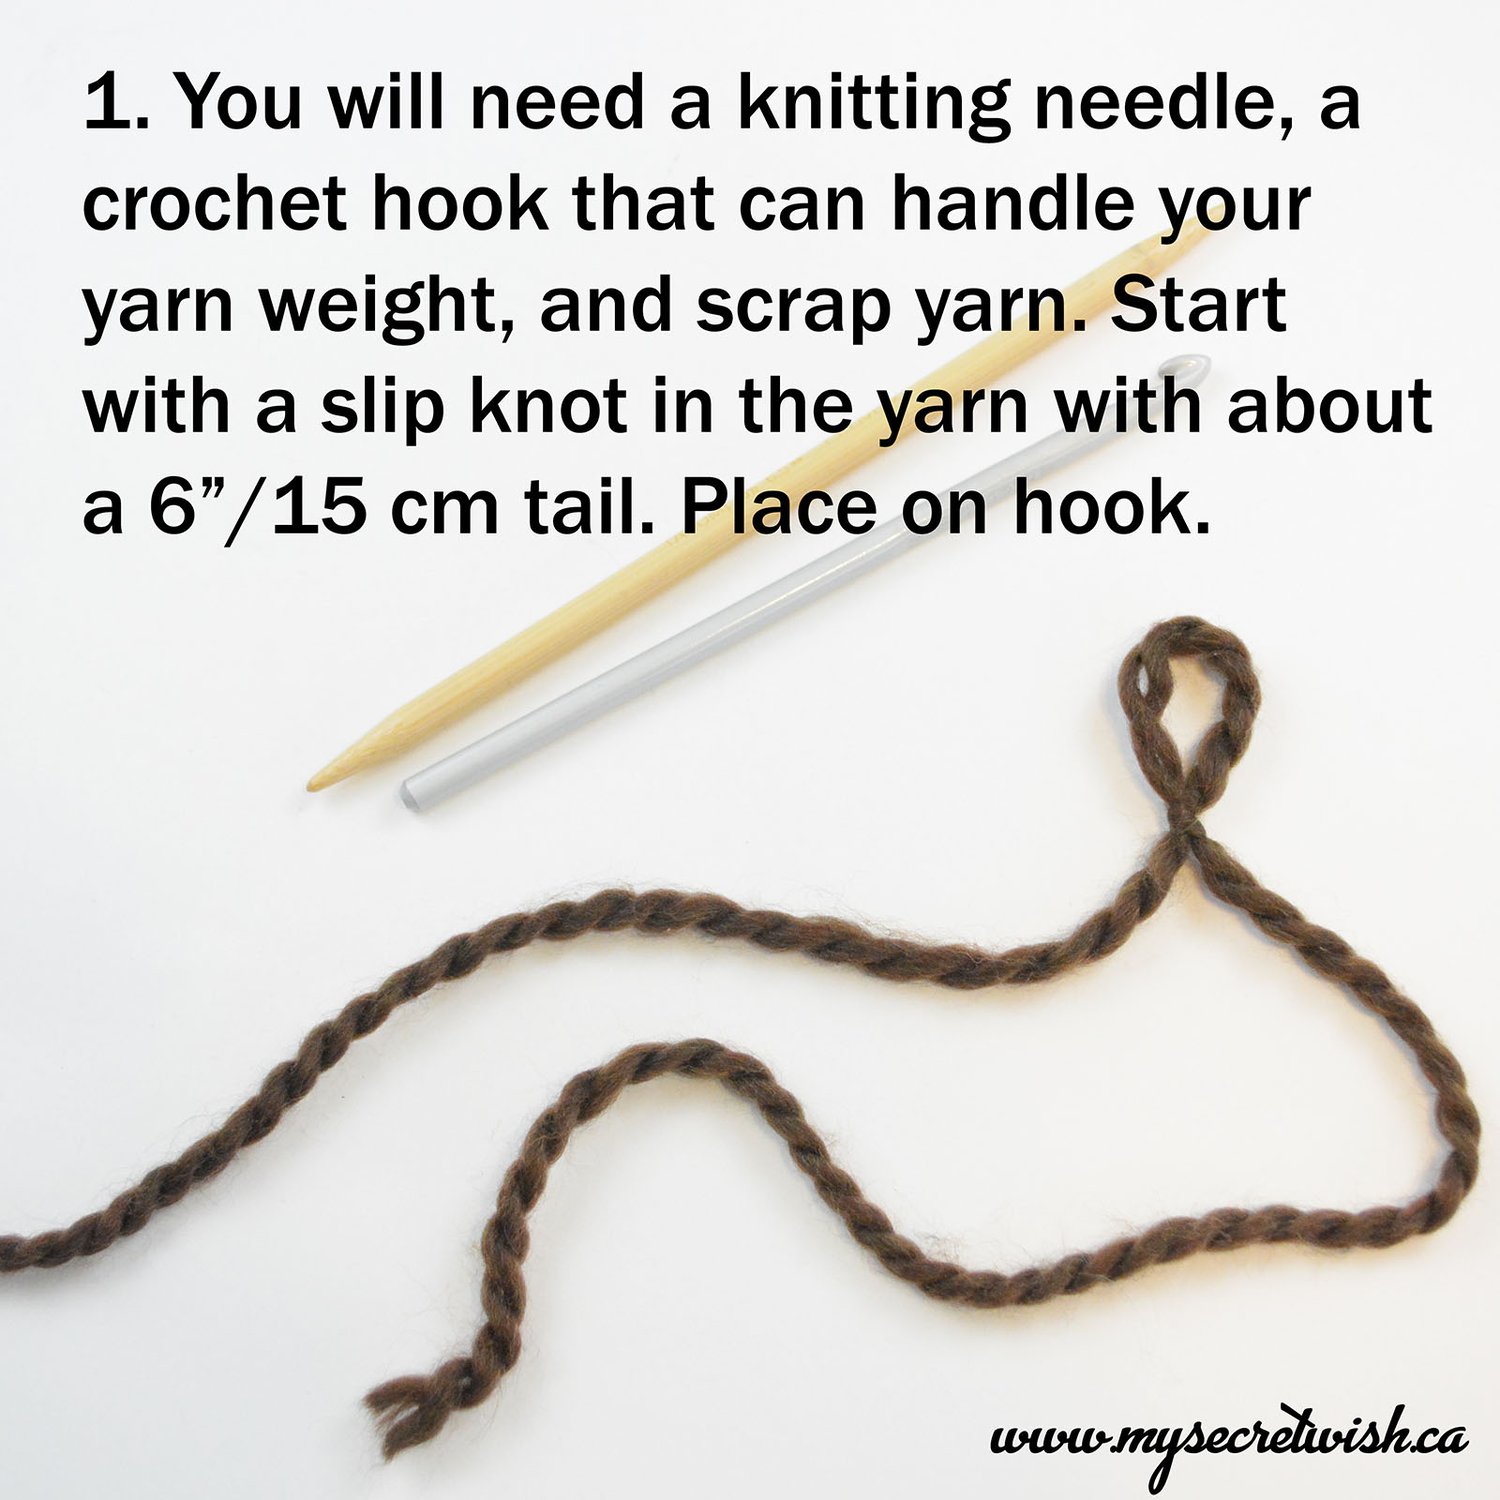
You will need a knitting needle, a crochet hook that can handle your yarn weight, and scrap yarn long enough to create the cast-on edge (about three to four times as long as the finished edge). Start with a slip knot in the yarn, leaving a tail that is approximately six inches (or fifteen centimetres) long. Place on hook.

 
Provisional Cast On step two

Step Two:

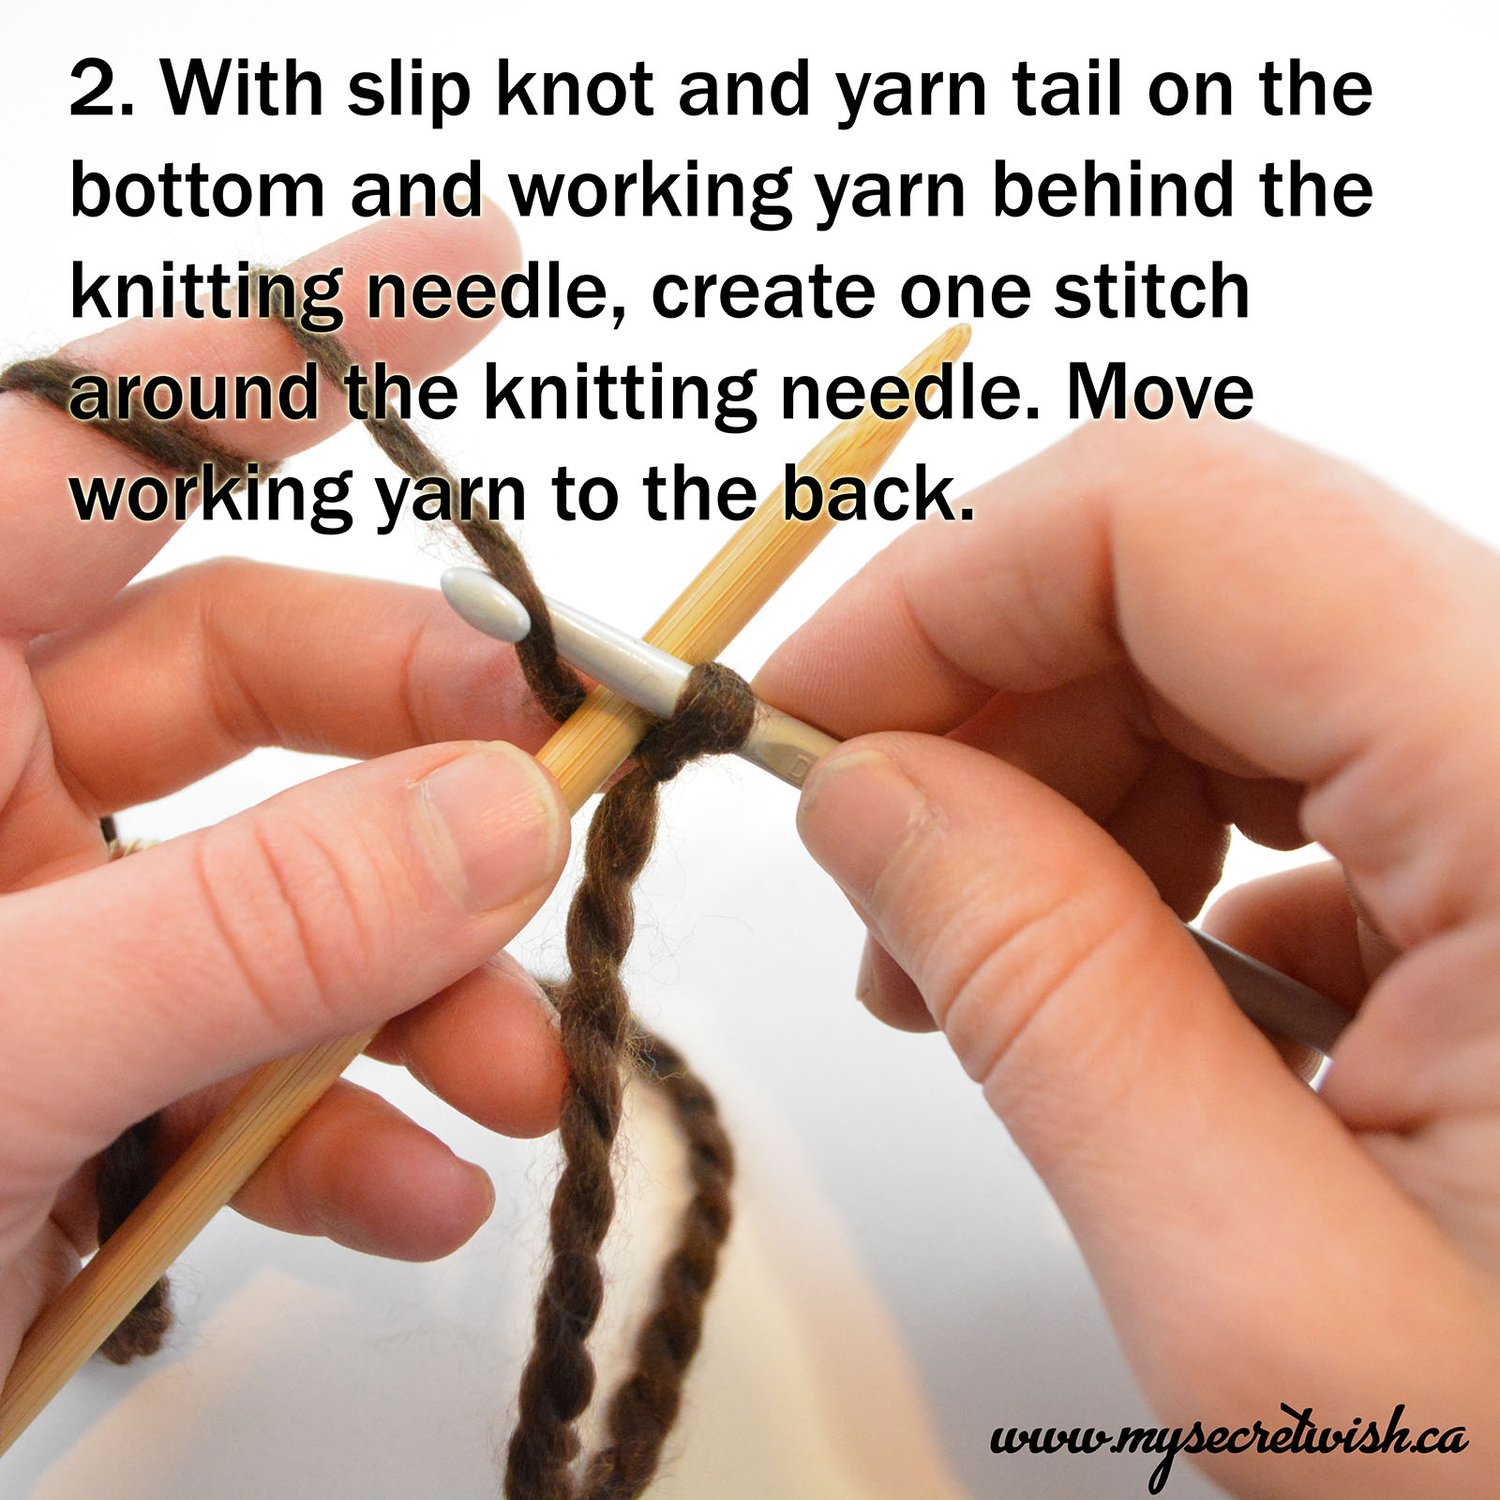
With slip knot and yarn tail on the bottom and working yarn behind the knitting needle, create one crochet stitch around the knitting needle as follows:

  1. Move hook over top of knitting needle and catch the working yarn.

  2. Pull working yarn back through the loop on the crochet hook.

This will leave a loop of yarn around the knitting needle and a loop of yarn around the crochet hook, both going through the original slip knot. The working yarn will be in front of the knitting needle.

IMPORTANT: Move working yarn behind the knitting needle before creating next stitch.

 
Provisional Cast On step three

Step Three:

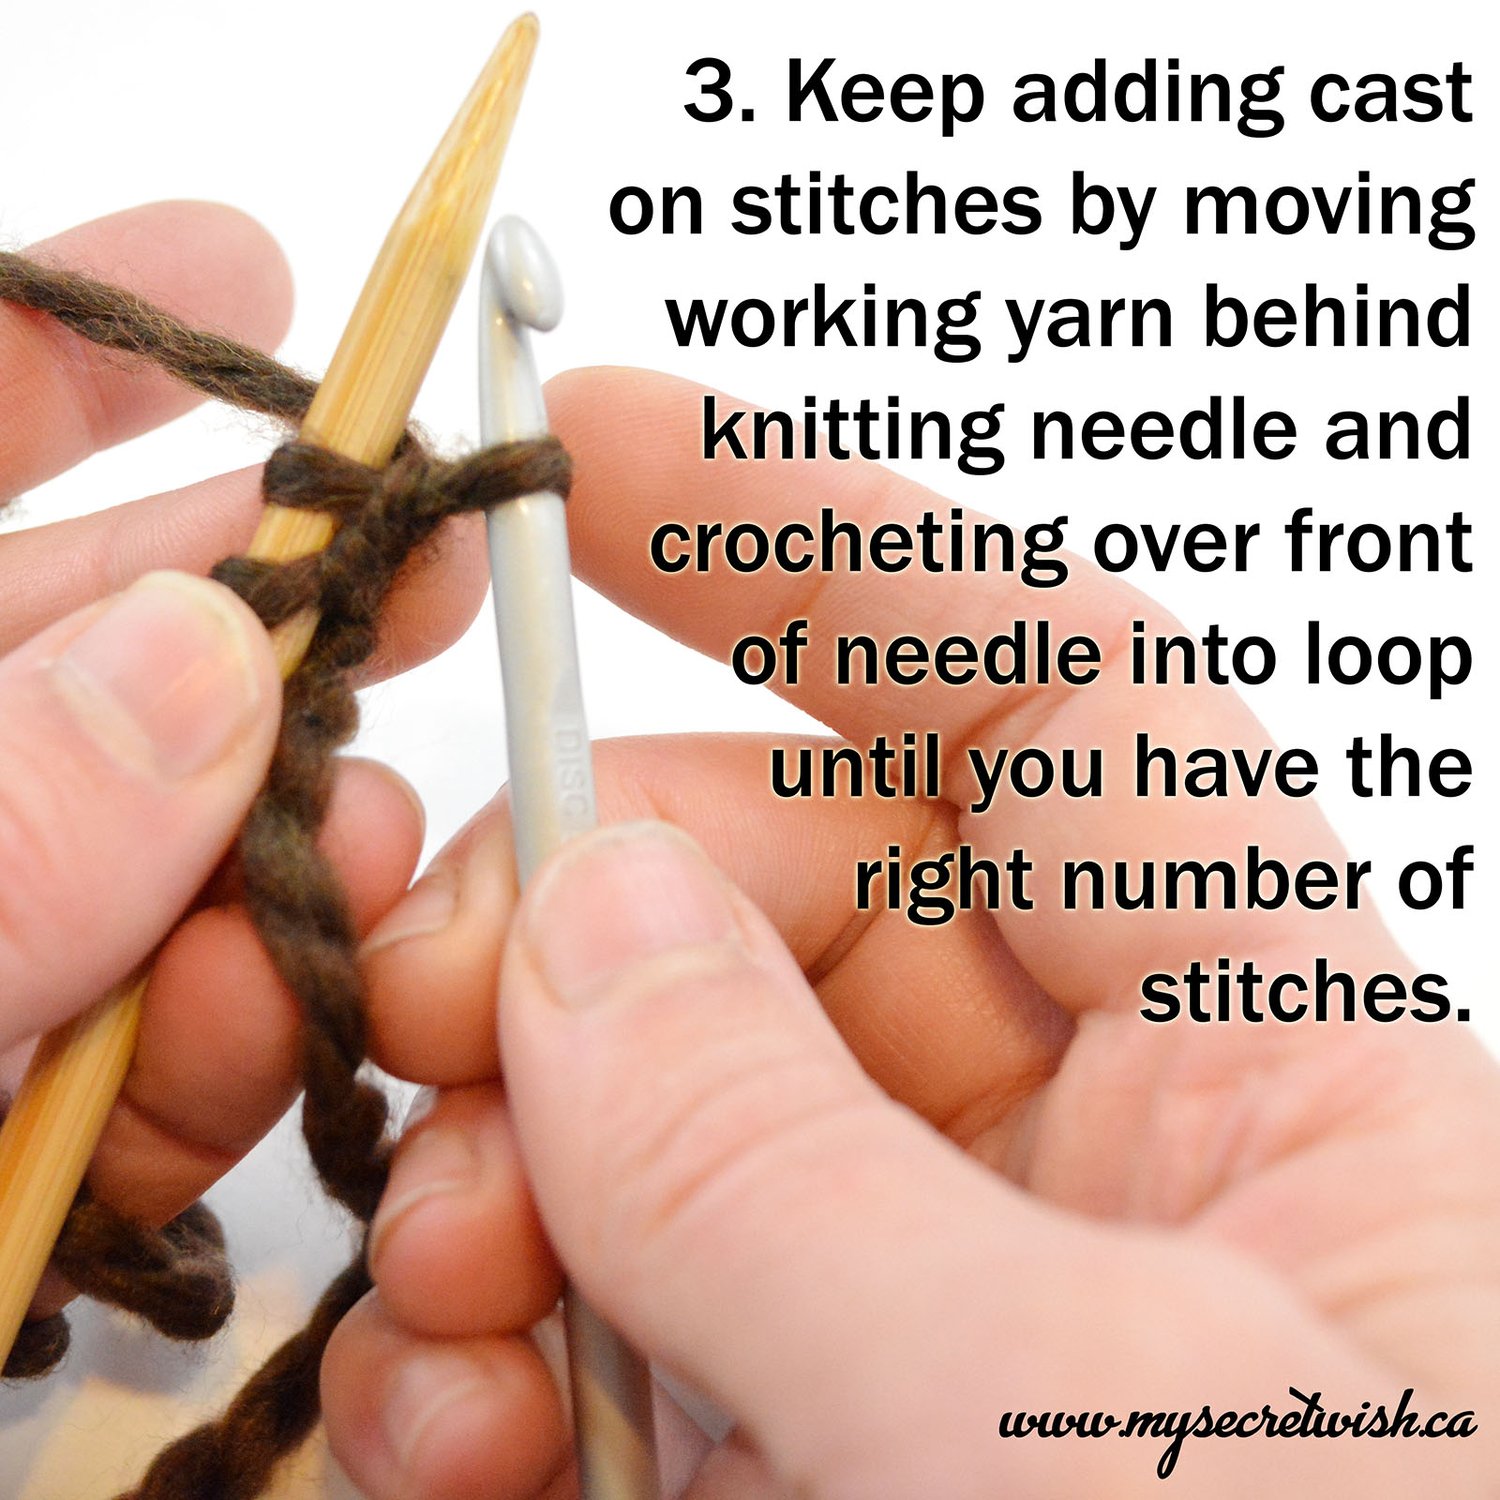
Keep adding cast on stitches by moving working yarn behind the knitting needle and crocheting over the front of needle into loop until you have the right number of stitches.

 
Provisional Cast On step four

Step Four:

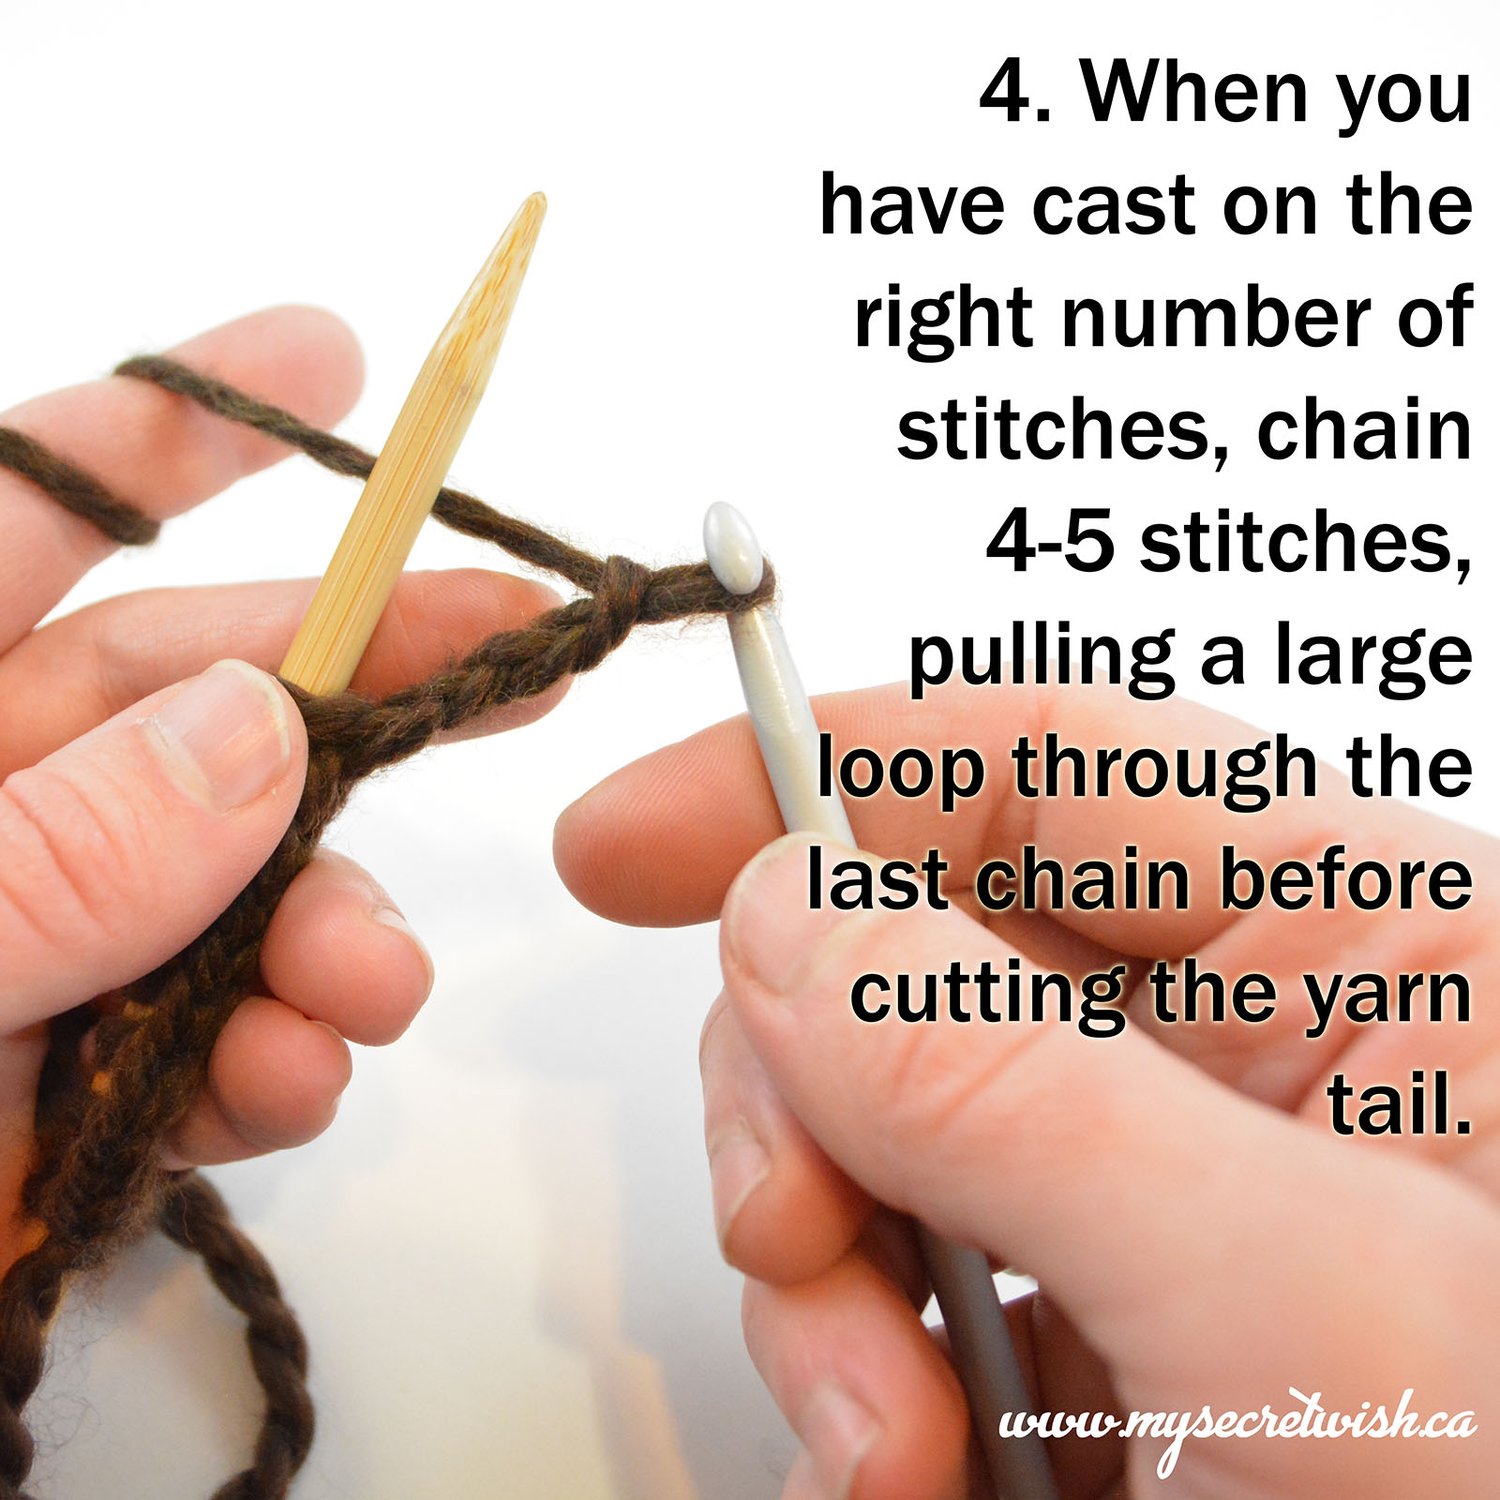
When you have cast on the right number of stitches, chain* four to five stitches and then pull a large loop through the last chain before cutting the yarn tail.

*Create a chain stitch by hooking the working yarn without the knitting needle in the way and pulling the yarn through the loop on the crochet hook.

 
Provisional Cast On step five

Step Five:

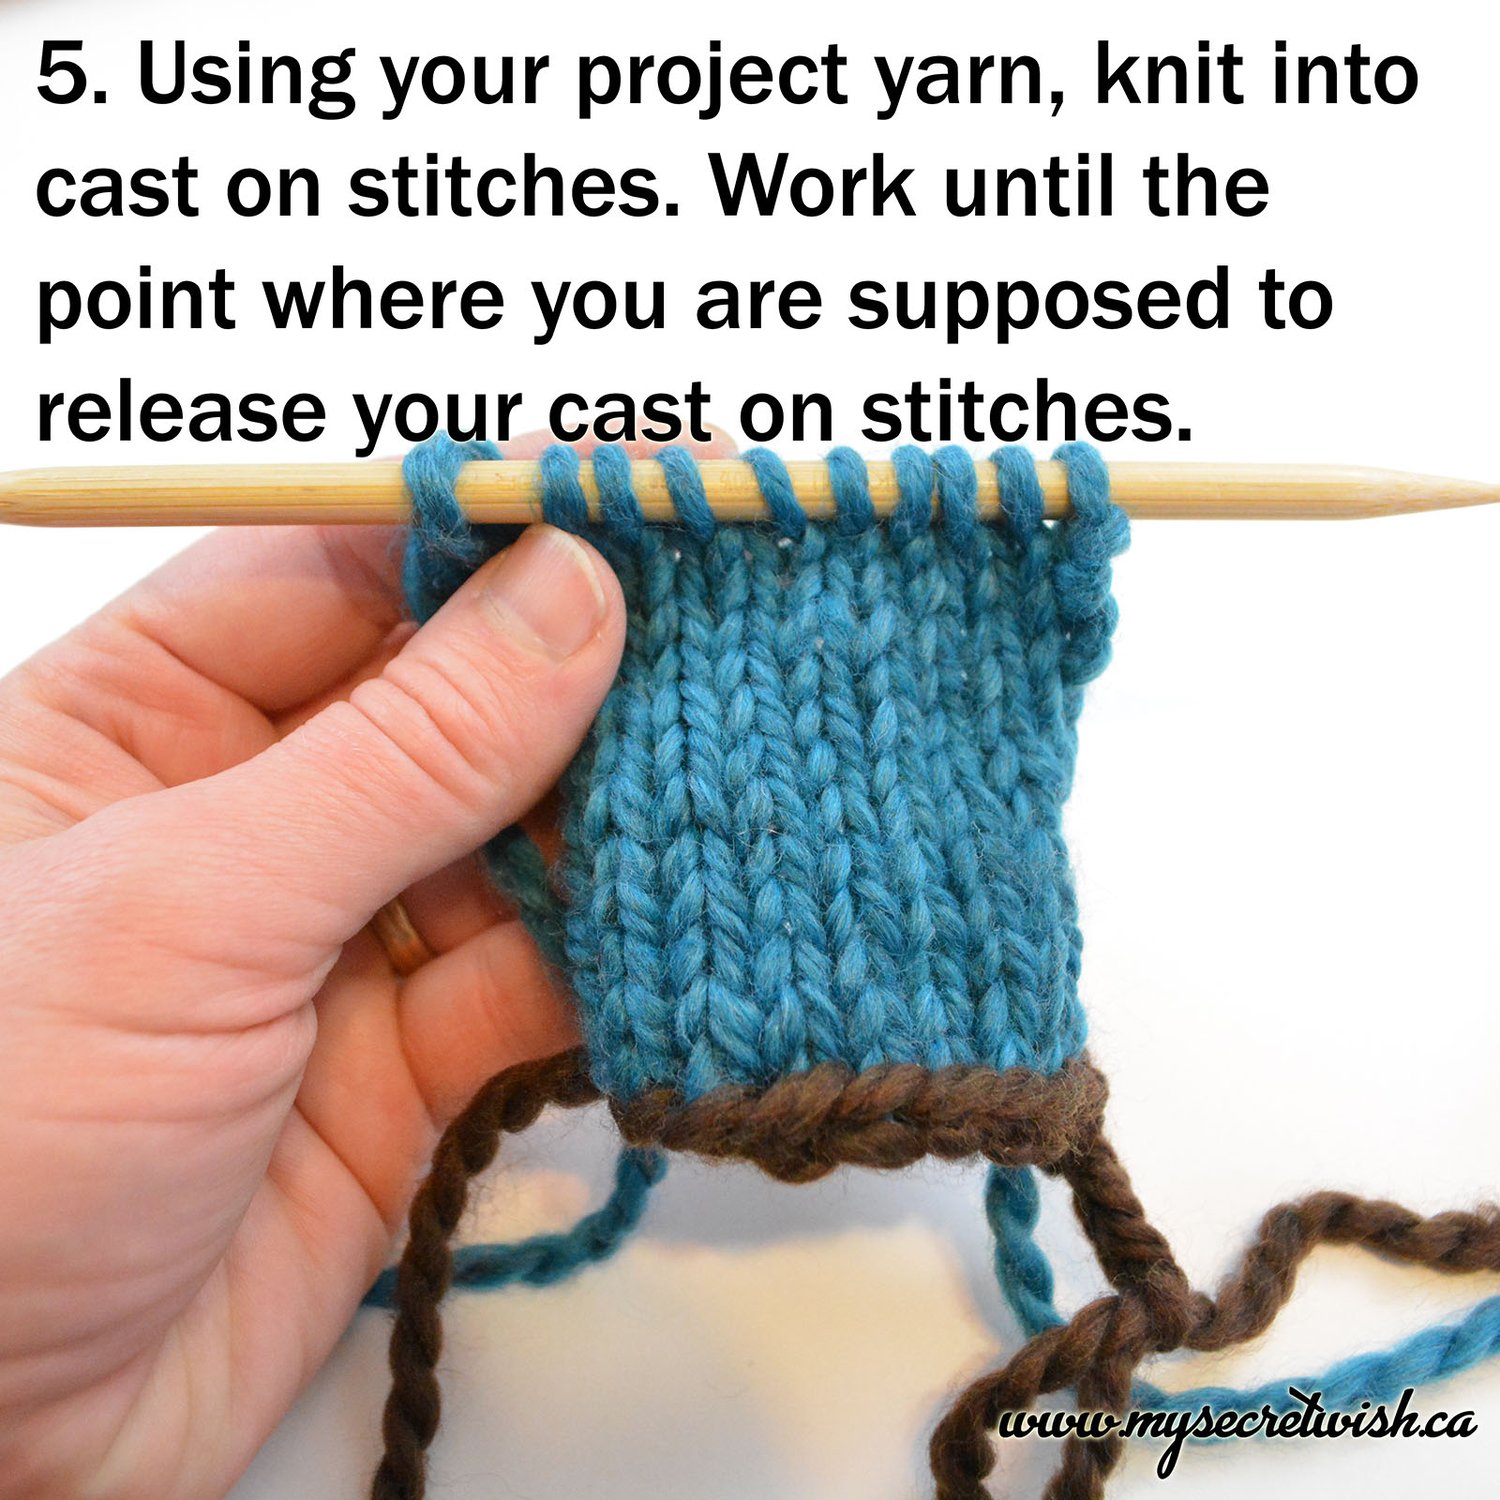
Using you project yarn, knit into cast on stitches.

Work your project until the point where you are supposed to release your cast on stitches. (This is often where you will join two ends of a hatband or where you turn up a folded hem to join.)

 
Provisional Cast On step six

Step Six:

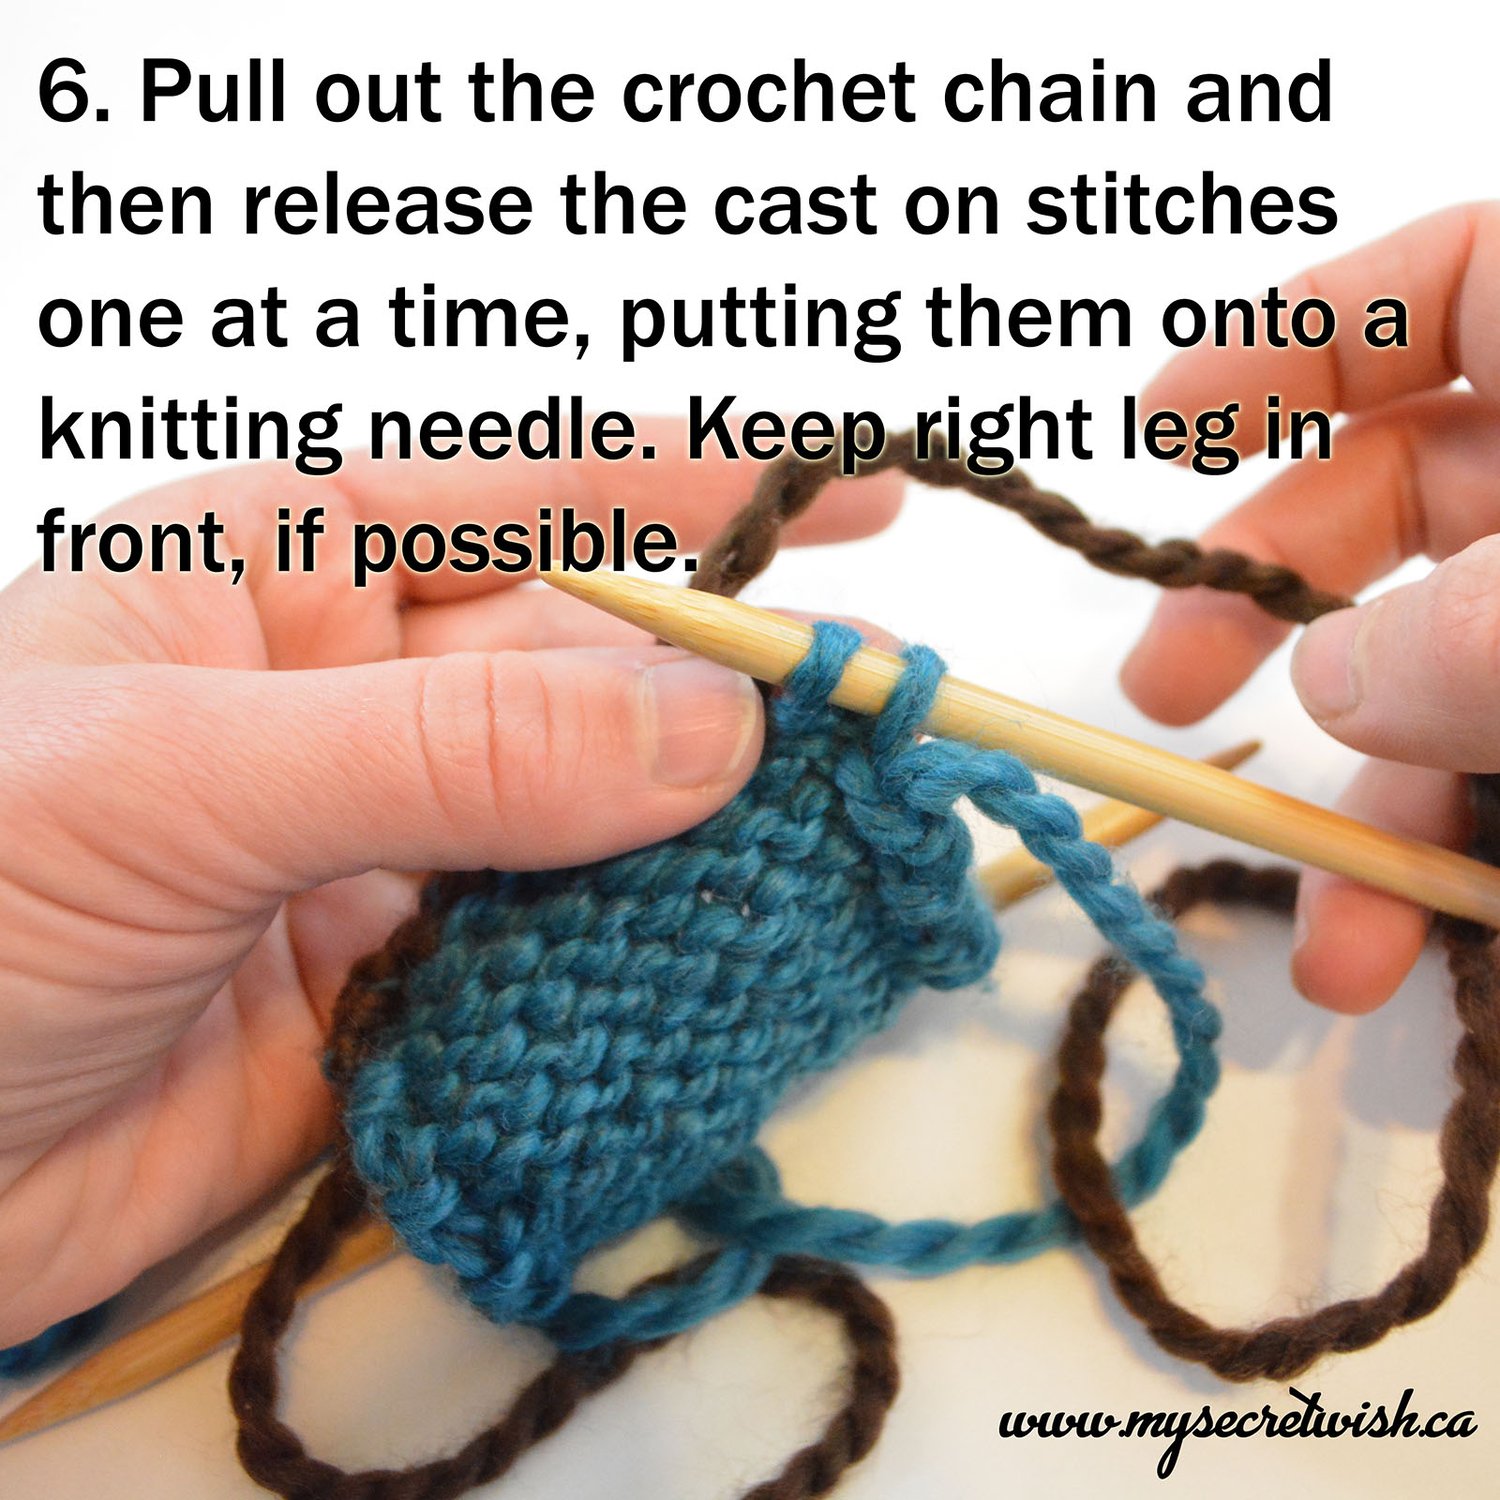
Pull out the crochet chain and then release the cast-on stitches one at a time, putting them onto a knitting needle. Keep right leg in front, if possible.

(If you end up with some of the left legs in front, simply fix how they are laying when you get to them while working the next row, or knit into the right leg of that stitch anyway, which will be on the back of the needle.)

 
Provisional Cast On step seven

Step Seven:

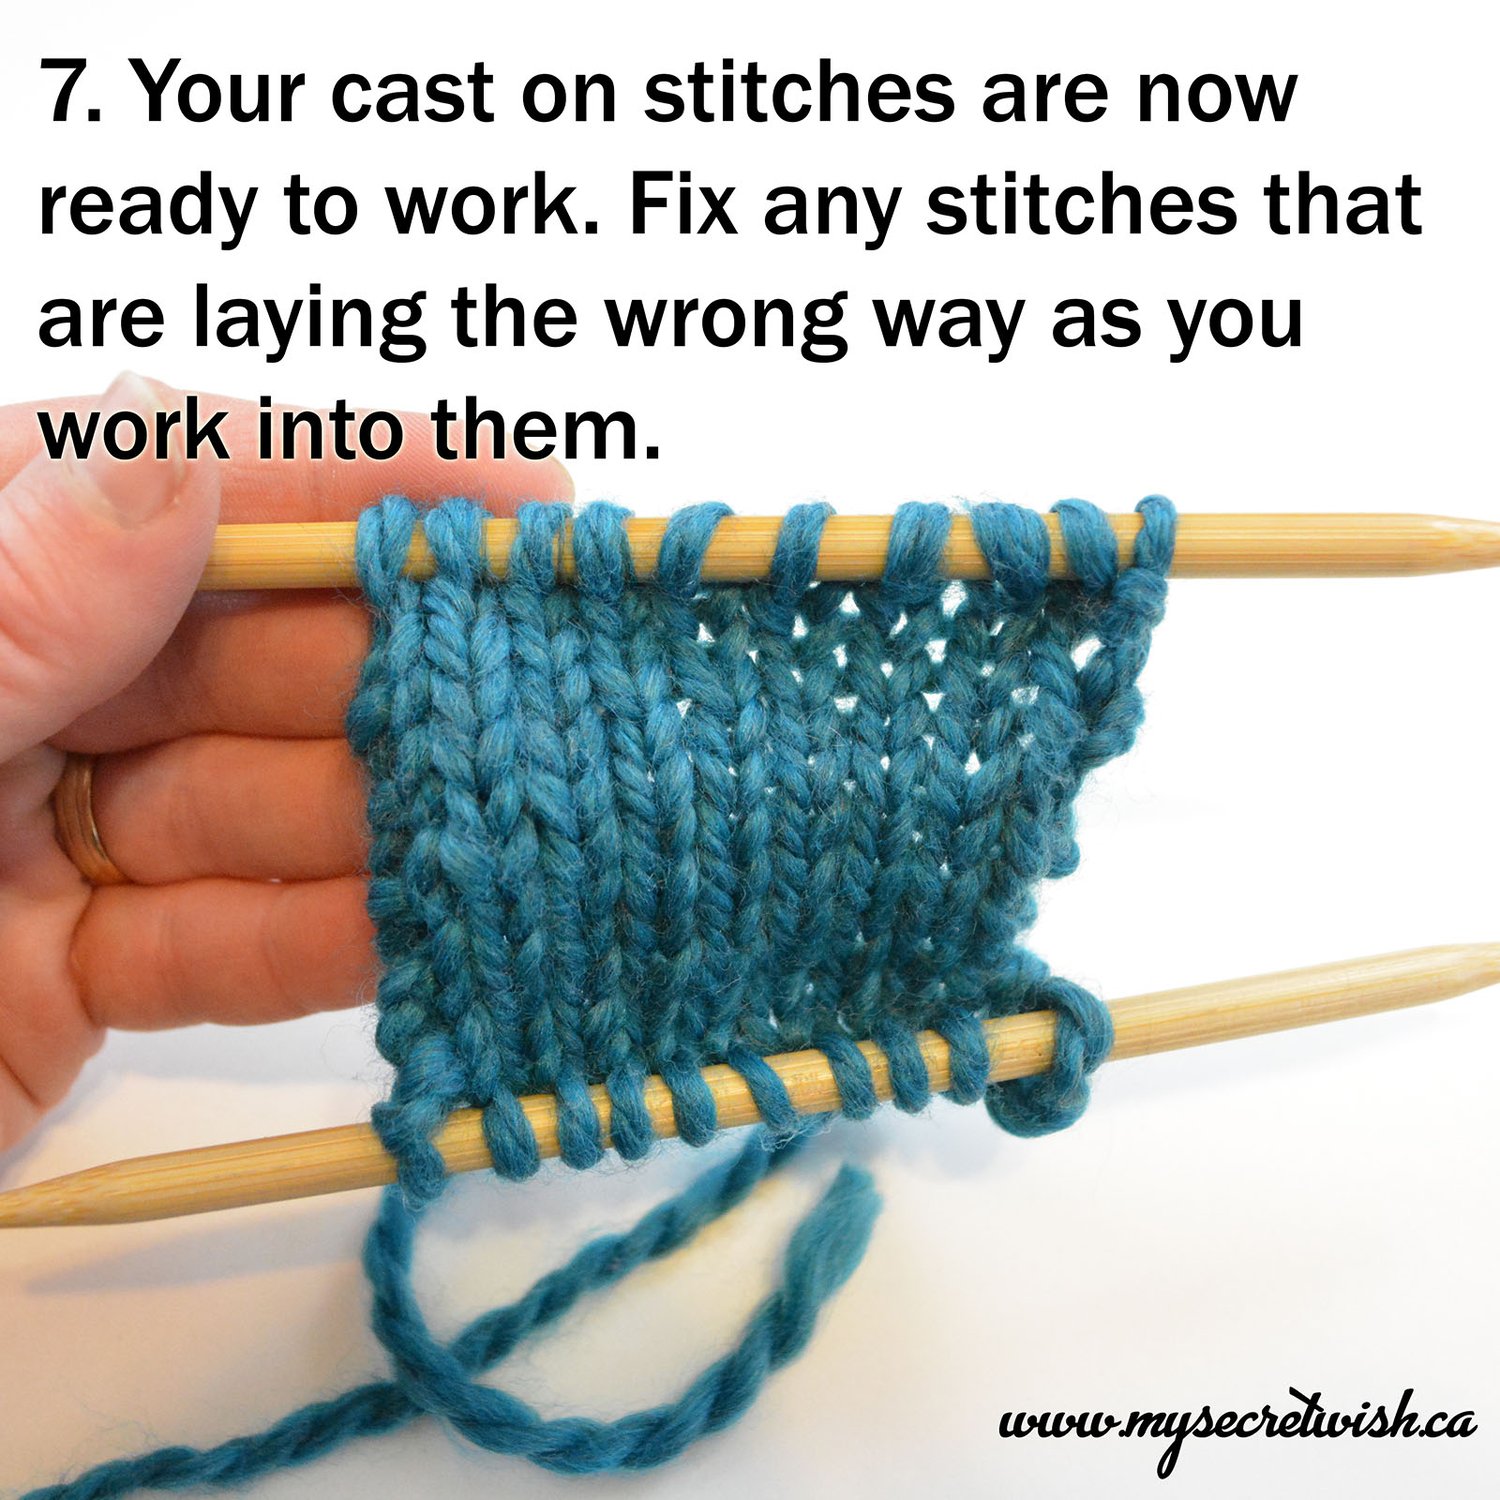
Your stitches are now live and ready to work. Fix any stitches that are laying the wrong way as you work into them, as described above.