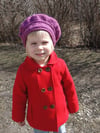
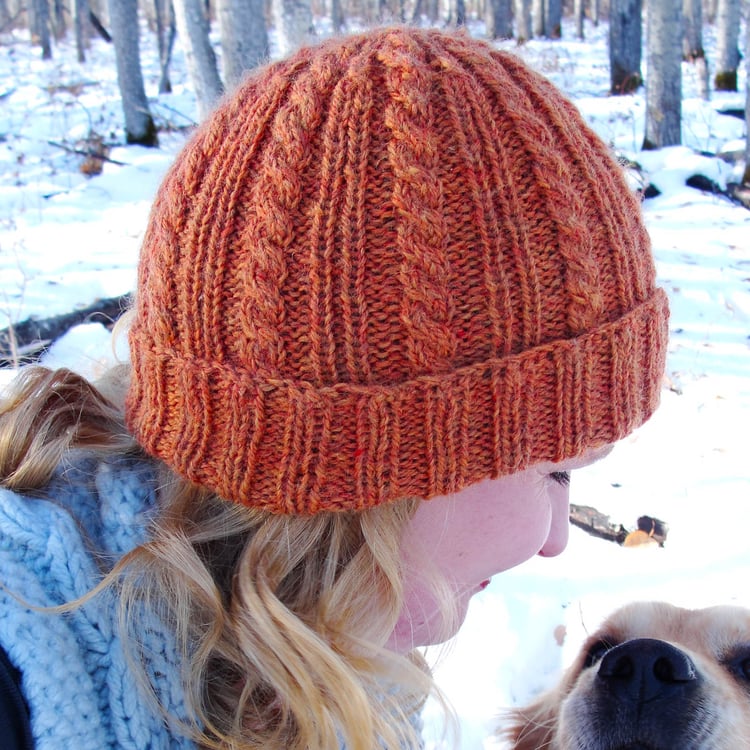
For the Royal Highness in all of us…
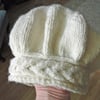
Inspired by the youngest “Daughter of Eve” to become a Queen of Narnia in the classic book series The Chronicles of Narnia by C.S. Lewis, this seamless hat is made by knitting the staghorn cabled hatband flat, grafting the ends to make a circle, then picking up and working the slouchy crown in the round.
Sized for heads from Child’s Small (18 inches or 45 cm) to Ladies’ Large (23 inches or 57.5 cm) and made in chunky-weight yarn, it knits up quickly and makes a great gift.
PROJECT LEVEL: Intermediate
—
Digital download includes:
- PDF (standard) - best for printing or for sighted knitters
- PDF (Screen Reader Accessible Large-Print) - best for Print Challenged knitters and reading on phones
- EPUB (eBook) - best for anyone who wants reflowable, resizable text
Refer to “Accessibility” below for more information about file types.
About Pattern
Construction
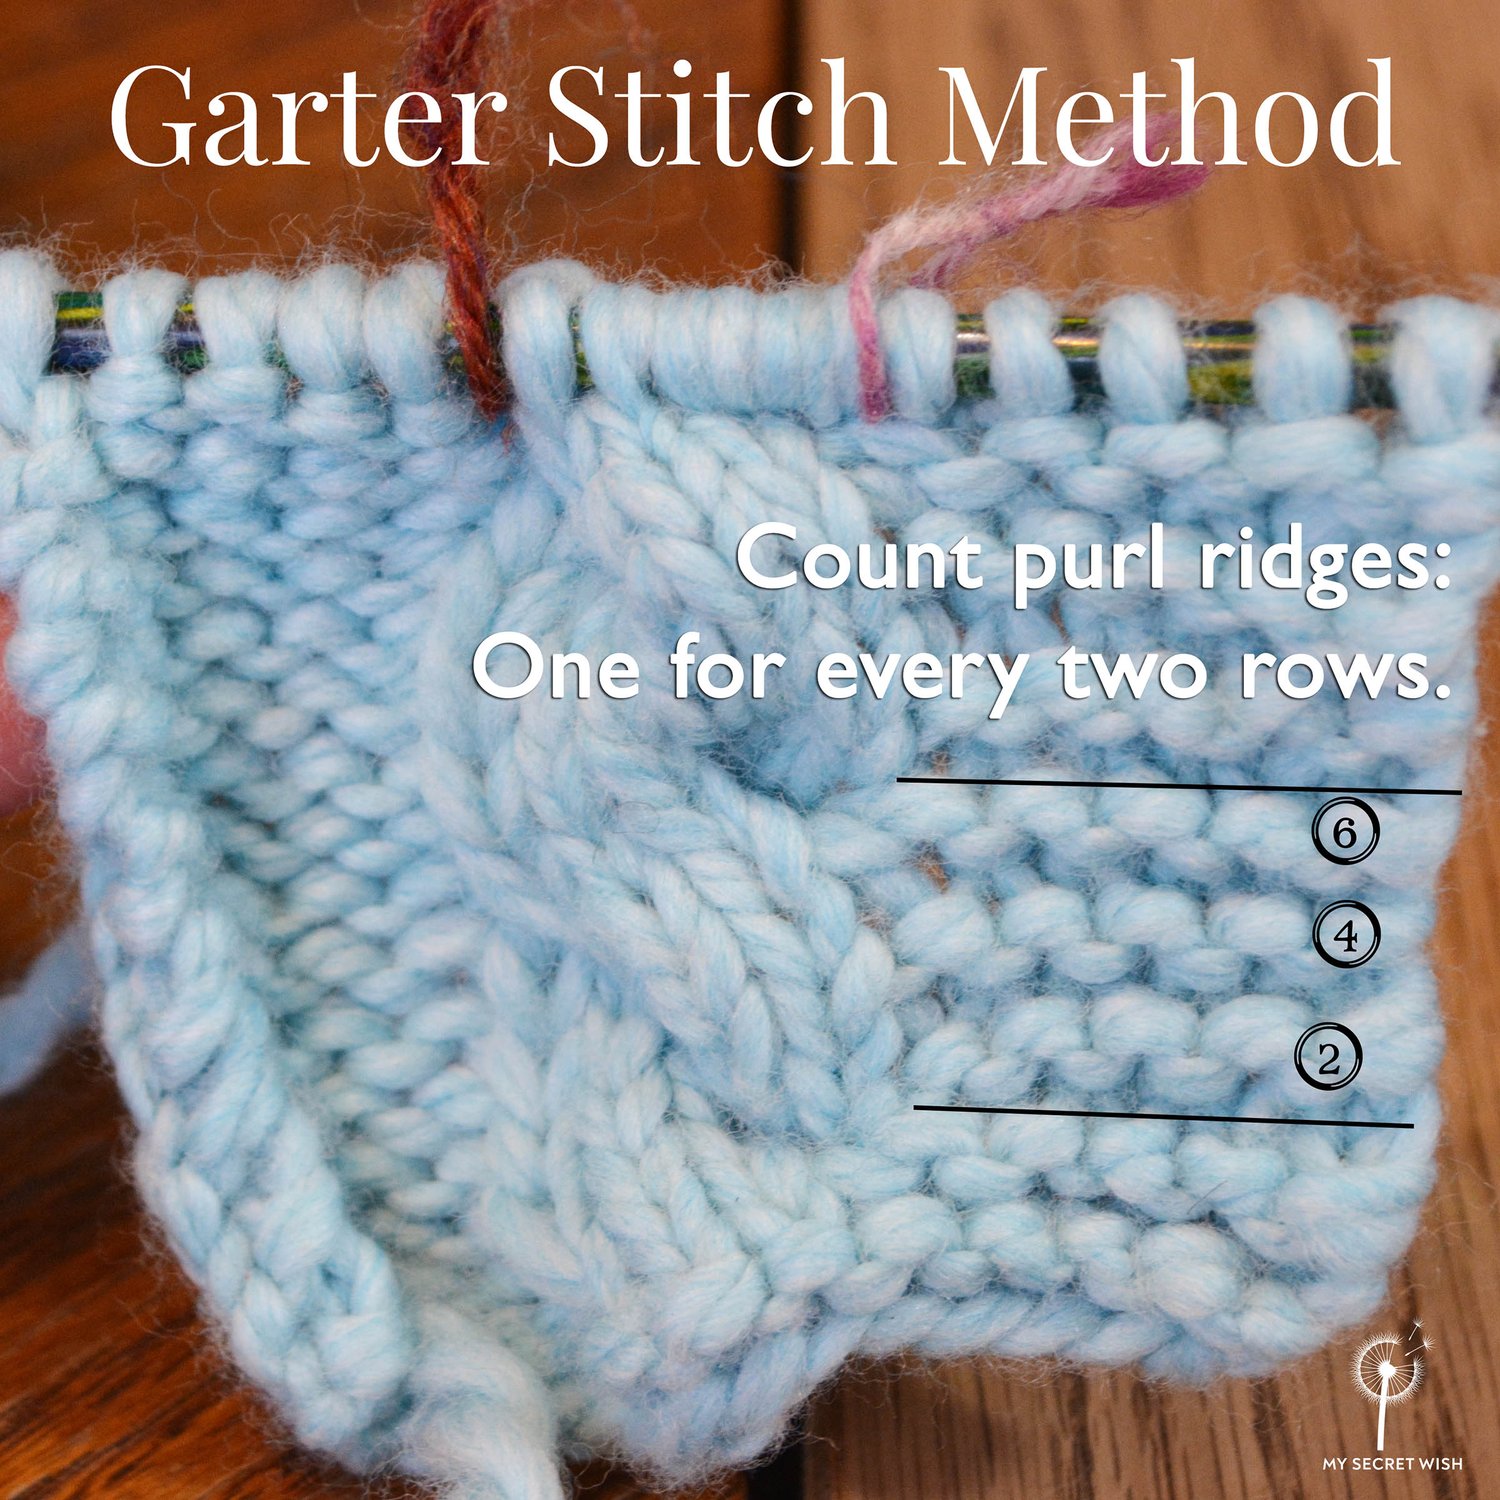
Hatband is knit flat first, then ends are grafted in a circle, stitches are picked up for the crown, which is worked in the round from the bottom up.
Sizes
1. Child’s Small (Toddler)
Head circumference: 18 inches (or 45.5 cm); Crown height: 6 inches (or 15 cm)
2. Child’s Medium
Head circumference: 19 inches (or 48 cm); Crown height: 7 inches (or 18 cm)
3. Child’s Large (or Youth Small)
Head circumference: 20 inches (or 50.5 cm); Crown height: 7.5 inches (or 19 cm)
4. Youth Medium (or Ladies’ Small)
Head circumference: 21 inches (or 53.5 cm); Crown height: 8 inches (or 20.5 cm)
5. Ladies’ Medium
Head circumference: 22 inches (or 56 cm); Crown height: 8.5 inches (or 21.5 cm)
6. Ladies’ Large
Head circumference: 23 inches (or 58.5 cm); Crown height: 9 inches (or 23 cm)
Supplies
Yarn
1 (1, 1, 1, 2, 2) ball(s) chunky-weight yarn with 125 metres in 100 grams (or 137 yards in 3.53 ounces)
Approximate yardages: 100 (109, 118, 125, 136, 148) meters [or 109 (119, 130, 137, 149, 162) yards]
Suggested yarn:
Knit Picks Wool of the Andes Superwash Bulky, a plied 100% Highland Superwash wool in bulky weight with 125 metres in 100 grams (or 137 yards in 3.53 ounces) that works up to 12 to 15 stitches on size 6.5 to 9.0 mm (US size 10 to 11) needles.
Needles
- 5.0 mm (US 8) and 6.5 mm (US 10 ½) double-pointed needles OR size needed to obtain gauge
- 6.5 mm (US 10 ½) 29-inch circular needle (optional; can be used with Magic Loop Method instead of double-pointed needles, and may be preferable for knitting the crown in the three largest sizes)
- Medium-sized crochet hook for Provisional Cast On and picking up crown stitches
Notions
- Cable needle
- Yarn needle
- Stitch marker (a yarn loop works fine)
- Scrap yarn for Provisional Cast On
Gauge
Use larger needles to check gauge.
- 15.5 stitches and 22 rows = 4 inches (or 10 cm) over stockinette stitch knit flat
- 17.5 stitches and 22 rounds = 4 inches (or 10 cm) over stockinette stitch in the round
Skills you will need
- Knit
- Purl
- Make a gauge swatch in stockinette stitch
All other required stitches are explained.
Techniques used
- Knitting flat
- Knitting in the round using double-pointed needles or one or two circular needles
- Simple cables from written instructions or a chart
- Provisional Cast On
- Grafting stitches
Included resources
- A comprehensive list of links to online tutorials on my website for necessary skills. Tutorials are screen-reader accessible, with instructions relayed fully in text, and also include videos and downloadable photo tutorials.
- Full glossary
- Instructions for alterations
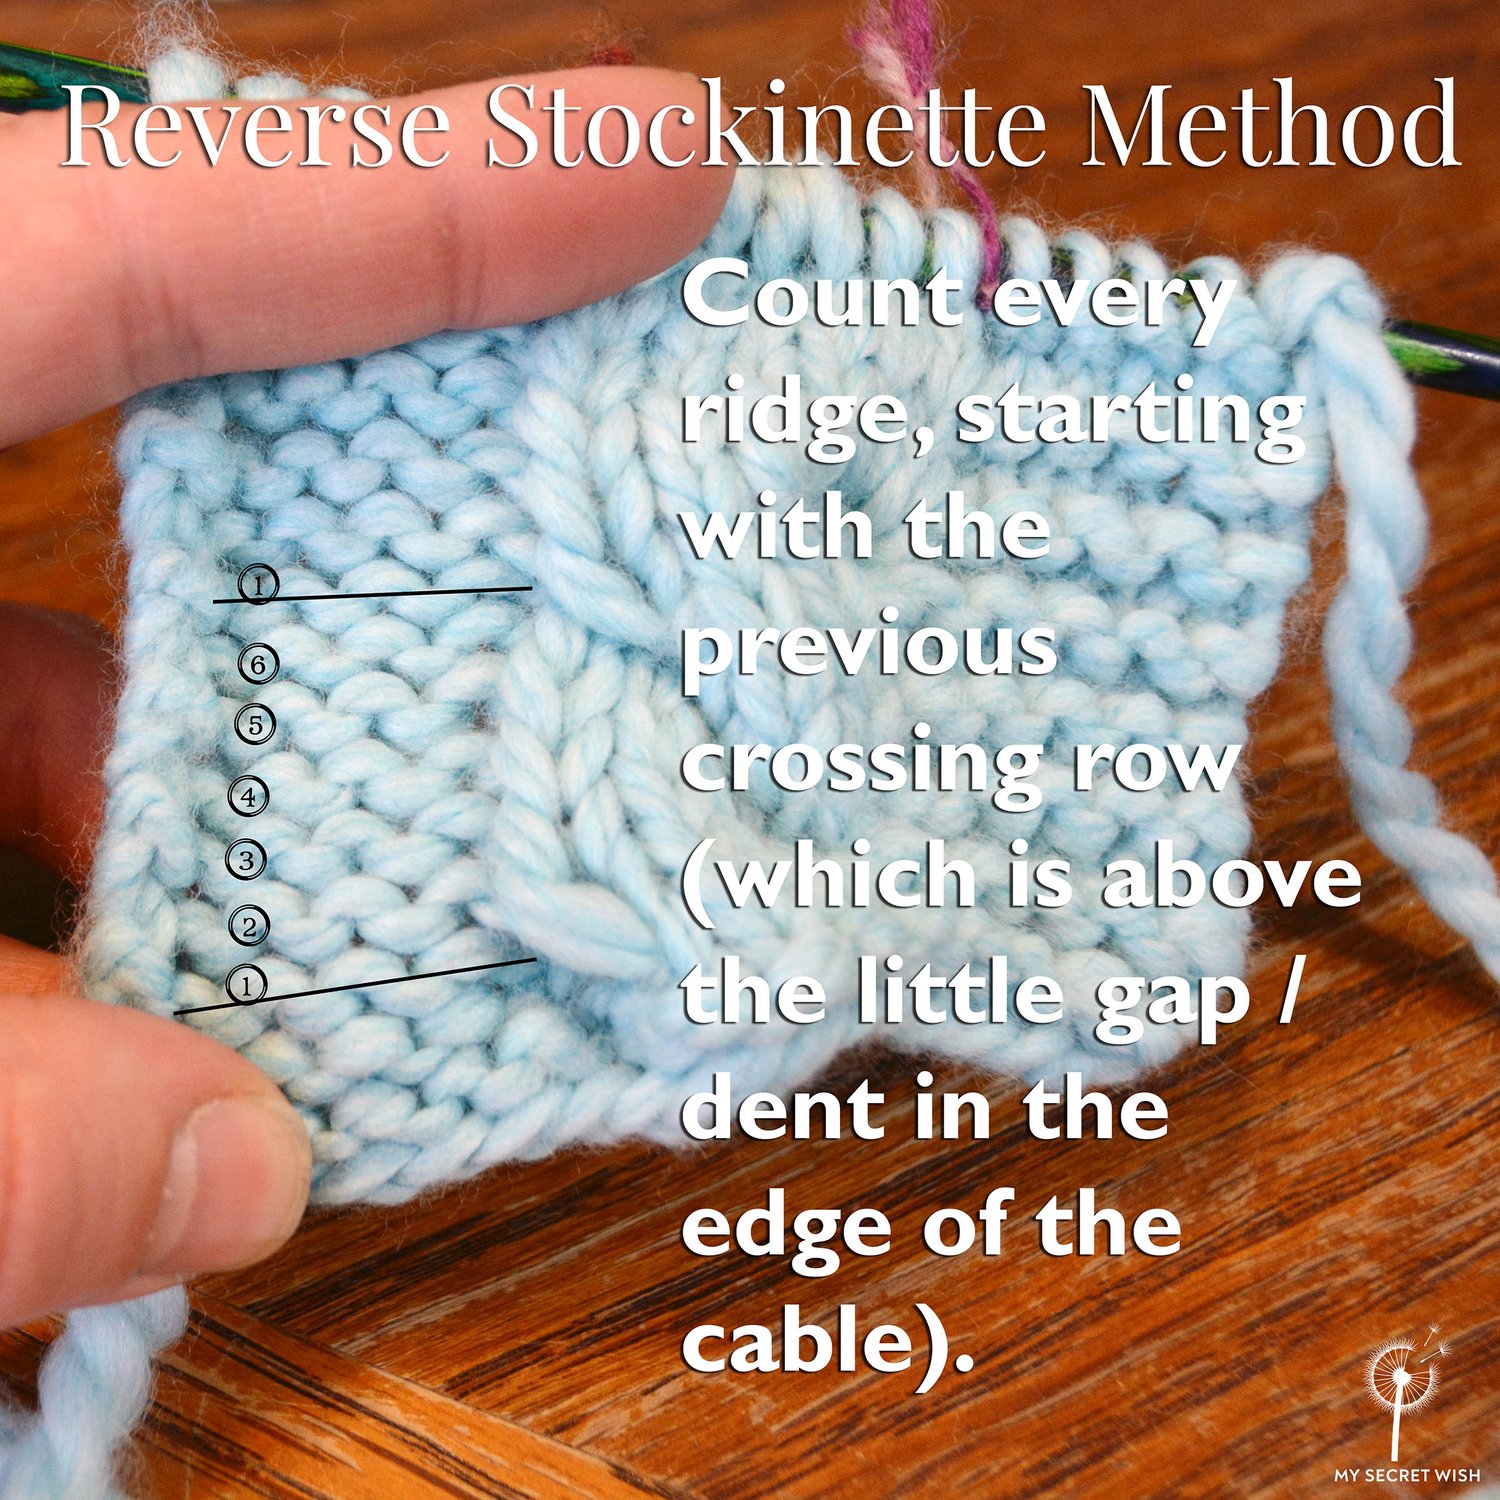
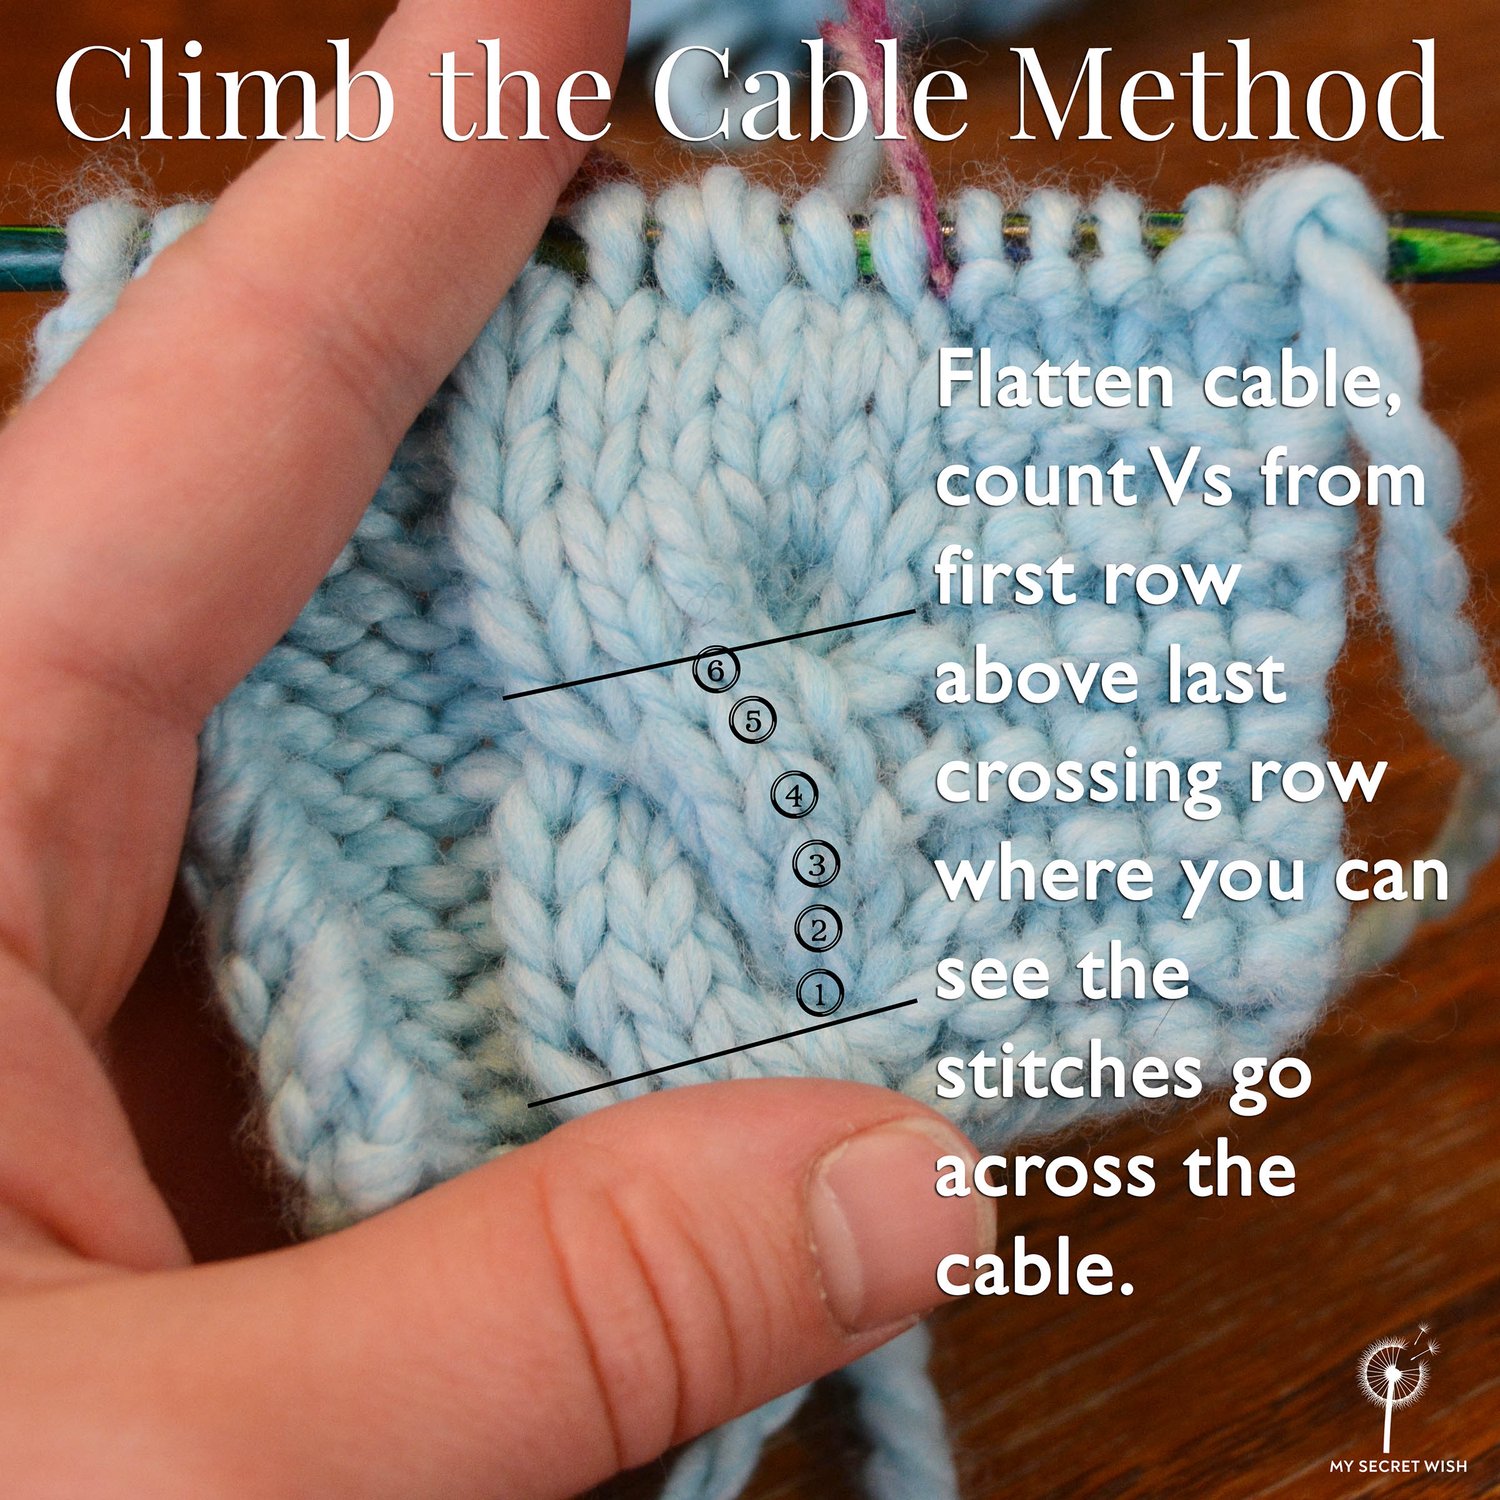
- Written and charted cable instructions
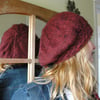
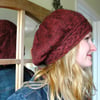
About Samples
Samples were knit in discontinued versions of Bernat Softee Chunky (purple and cream) and Bernat Naturals Alpaca (burgundy).
Suggested Substitute:
Knit Picks Wool of the Andes Superwash Bulky, a plied 100% Highland Superwash wool in bulky weight with 125 metres in 100 grams (or 137 yards in 3.53 ounces) that works up to 12 to 15 stitches on size 6.5 to 9.0 mm (US size 10 to 11) needles.
- This suggested substitute has been tested and found to be even warmer, more comfortable to wear, and have better for stitch definition than the original yarns.
- To replicate these looks, try Garnet Heather or Amethyst Heather colourways.
Note on yarn choice:
Yarn choice can make a big difference in the structure of this hat. A denser yarn will have more structure, like the purple sample, and a less dense yarn will drape better, like the burgundy sample.
Look for a plied chunky-weight yarn that is not too dense, with good stitch definition and a soft hand. Solids and heathers will reveal the cable pattern the best. Natural fibres will be warmer than acrylic, have better stitch definition, and be less slippery on fine or straight hair. (“Chunky” is the term used for slightly thinner bulky-weight yarns. Based on stitch count comparisons alone, an aran/heavy worsted weight yarn might also work.)
Publishing Information
Release Date: 2011
Most recent revision: July 2023
Publisher: My Secret Wish Publishing
Knitting pattern type: Single Design Option
Project type: Hat, Beanie, Toque
Page Count: 7
Page Count (Large Print): 38
COPYRIGHT AND LICENSING NOTICE:
This pattern is copyright My Secret Wish by Talena. Your purchase of this pattern gives you the right to use it for personal, non-profit use only. To license the pattern to use for profit, please e-mail me for permission. You do NOT have the right to print the pattern for other people (unless they reside in your household) or to transfer the digital file to any other person. This pattern may not be sold, copied, or distributed in any way.
Update History
September 2022: Revised formatting of PDF to align with current template style. Clarified language where necessary. Converted PDF to be screen reader accessible.
May 18, 2023: Updated URLs for new store and social links.
July 26, 2023: Created Large-Print Screen-Reader Accessible PDF and ePUB versions.