Casting On
Learn how to begin, or cast on, your knitting project.
Adapted from How to Knit Lesson Six. Get the complete tutorial at the link below.

Learn how to begin, or cast on, your knitting project.
Adapted from How to Knit Lesson Six. Get the complete tutorial at the link below.
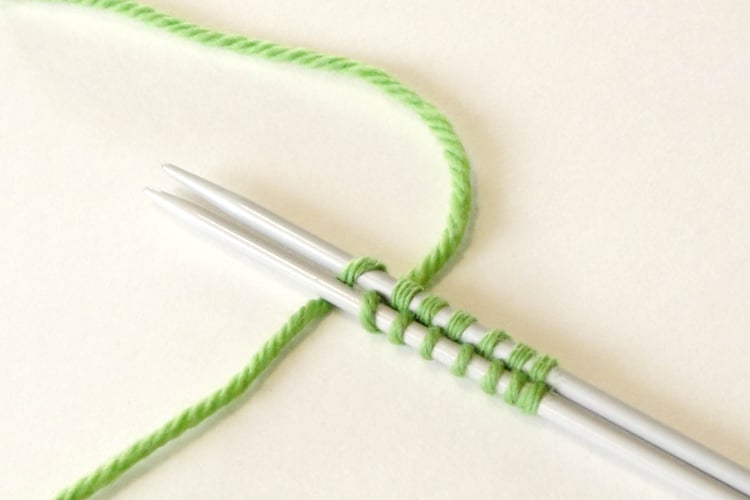
Casting on refers to the process of making a set-up row or round to give you some loops to work with from which to create your project. Because there are no pre-existing stitches to work with on your needle, you need to use a different technique than when you’re building the main fabric.
There are many, many ways to cast on and bind off (which means closing off live stitches so they don’t ravel), each of which has a different intended purpose and best use. The links below lead to tutorials for some common cast ons. (Refer to the Stitch Tutorial directory for even more options.)
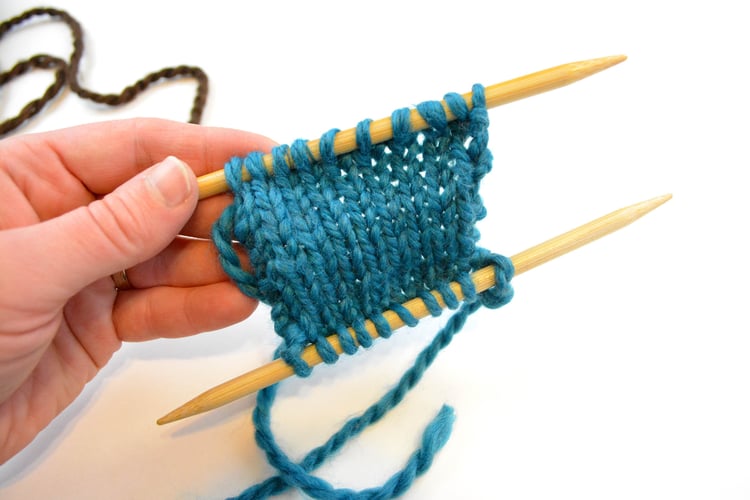
To cast on, you’ll create a set-up row of loops on the non-working needle using one of the cast ons below. Then, holding the non-working needle in your non-dominant hand, you’ll work new rows by creating new stitches on the working needle held in your dominant hand by pulling new yarn loops through the old stitches and dropping the old stitches off of the non-working needle. In a way, it’s like you’re transferring your stitches from the non-working needle to the working needle, except you’re adding rows at the same time.
If you’re knitting back-and-forth, you’ll eventually reach the end of the row. When all of your stitches on the non-working needle are gone, it’s time to flip your needles around, put the needle full of stitches in your non-dominant hand, and start all over again.
If you’re knitting in the round, you’ll use a marker to indicate the beginning of the round, and you’ll never need to turn your needles (except in rare circumstances for more advanced techniques).
The main concern when learning to cast on or bind off is to not do it too tightly. You’ll know if it’s too tight if the edge of your piece pulls in compared to the rest, and your first row after casting on will be extremely tight and difficult to work. The only way to fix this problem is to unravel it (also known as frogging because you rippit, rippit) and do it again.
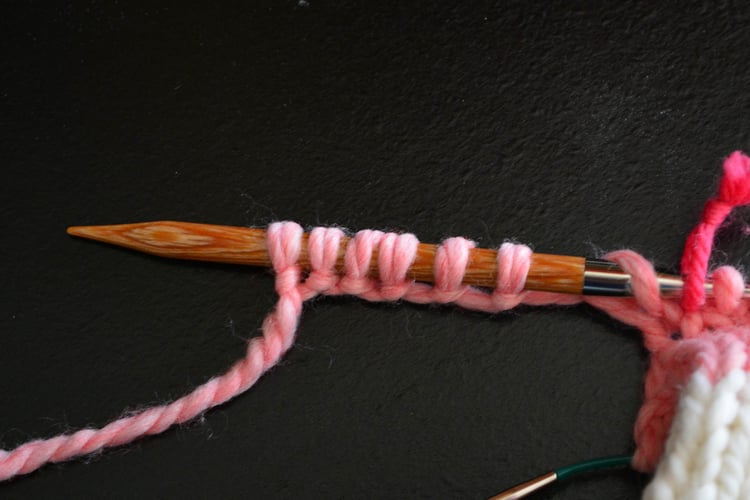
When casting on, especially when you’re learning, leave more space than you think you need between stitches. A good rule of thumb is that there should be a space about the width of a stitch between each cast-on stitch on your needle.
A trick some use to make sure their cast ons aren’t too tight is to cast on to a needle two or three sizes larger than your pattern calls for, then knit onto the appropriate size to make gauge after that. Or you could cast on around two needles held together. Personally, I don’t recommend this, as I find this option leaves too much yarn in the cast-on edge and makes it all loosey-goosey, which is as bad as being too tight because the edge looks untidy and the fabric you build from it is poorly structured. However, you could use it if you’re in a pinch.
If possible, for your very first practice project, get an experienced knitter to cast on for you and work the first row. This allows you to just focus on learning the knit and purl stitches without the added difficulties the set-up rows present.
Then, after you’ve had a chance to get good at those stitches and you’re ready to try casting on yourself, work Knit Cast On. Since Knit Cast On uses the same foundational technique as the knit stitch, it’s great for beginners.
However, if you’re learning without a teacher, I recommend beginning with Knit Cast On anyway, since it starts teaching you the knit stitch while you’re casting on. OR you can start with Long-Tail Cast On, which is easy to do, creates a well-tensioned edge, and works for a wide variety of projects.
To be honest, until you know what to do with a cast on, it’s not much good to you. I recommend you bookmark this page, keep working through the How to Knit lessons, then come back to it when you’re ready to apply everything in “Making a Gauge Swatch”.
But if you’re itching to give all of this a try, read “Make a Slip Knot”, “Holding the Yarn”, and “Knit Cast On”. Then try casting on some stitches until you get the hang of it.
Start with these basic techniques and all-purpose cast ons, which will work for a wide variety of projects.
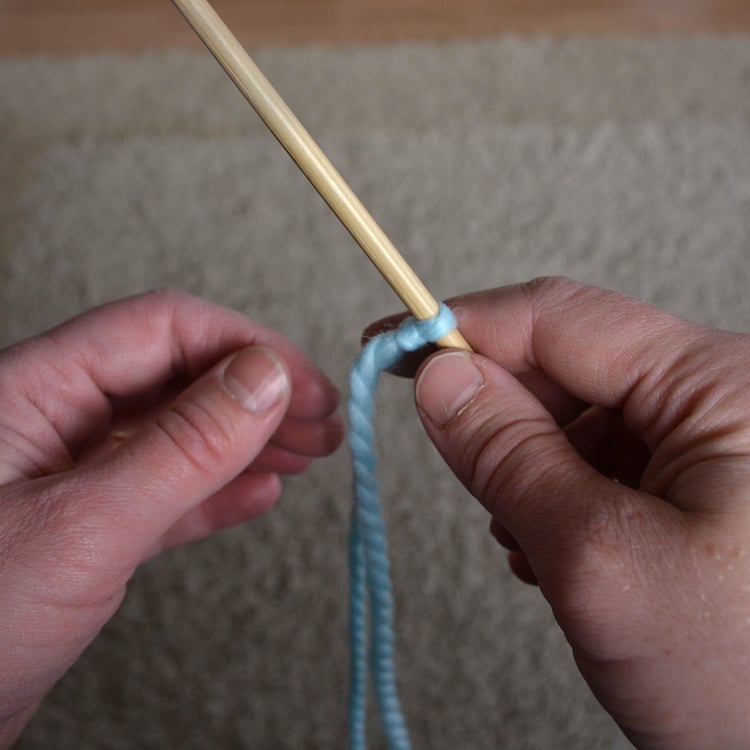
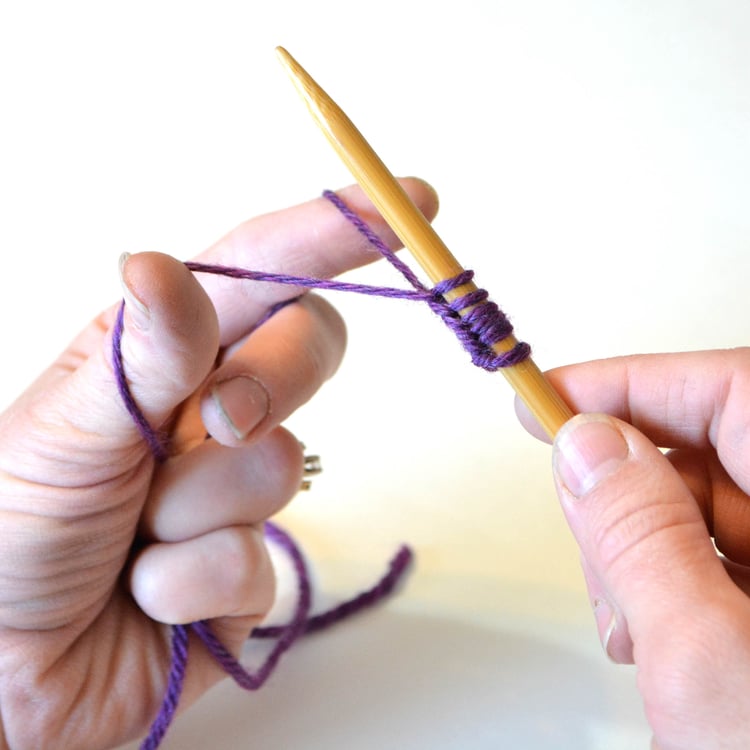
The first step for most cast ons is a slip knot.
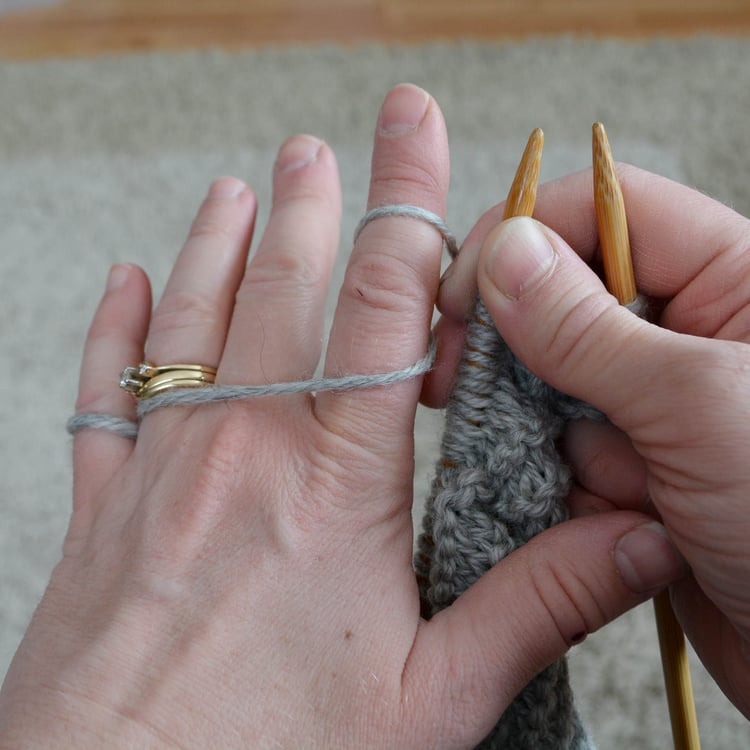
How you hold your working yarn is vital for keeping proper tension for your work. Get some pointers in this short lesson.
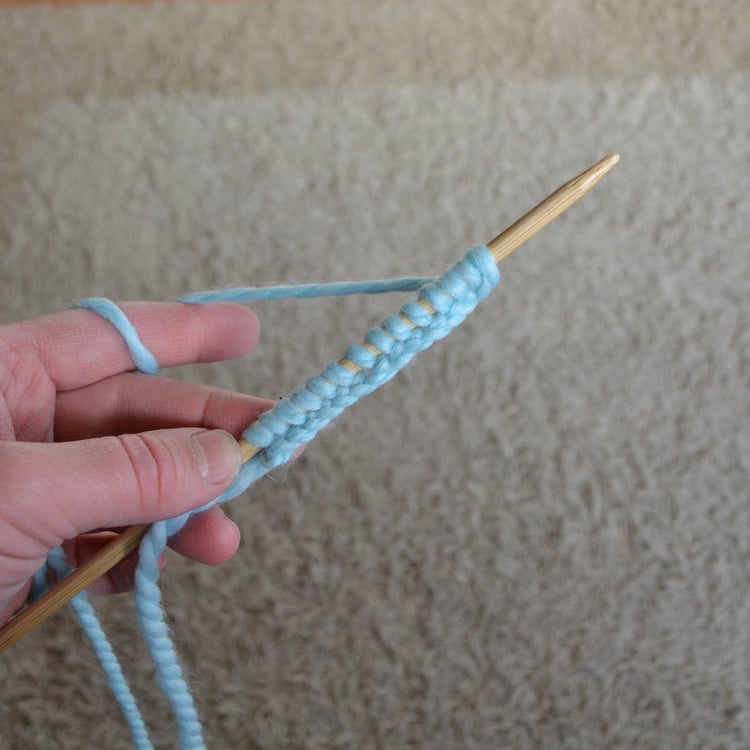
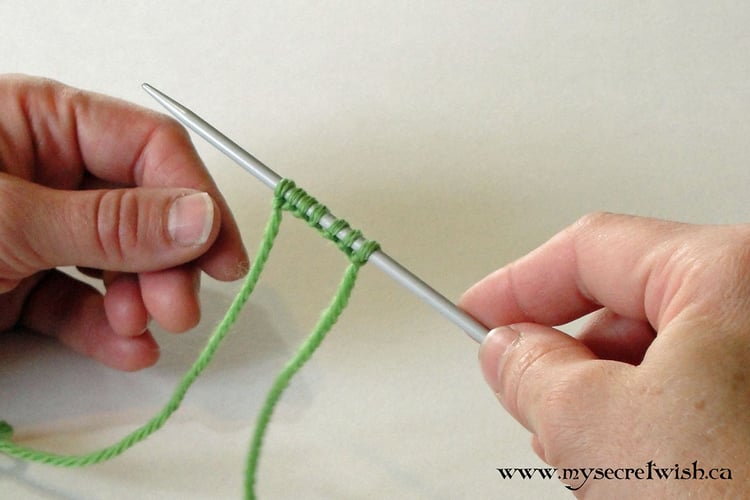
I recommend using this cast on when you are first learning, as it uses the knit stitch to cast on and you can learn that at the same time.
If you choose this cast on to start, read “Holding the Yarn” first.
Characteristics: Firm, non-stretchy, neat edge
Good for: Visible edges that need structure, such as dish cloths, decor items, or casting on a few stitches for garment shaping (at arm scyes or above a thumb gusset.)
This is slightly more complicated to learn than the previous cast on, but has a very wide range of uses. For many knitters, this is their favourite all-around cast on.
Characteristics: Firm, moderately stretchy edge, moderately easy to learn, easy to get proper gauge and tension.
Good for: Any visible edge that requires only moderate stretch. Perfect to begin a gauge swatch.
As you progress or work different types of projects, you’ll need to add these cast ons to your repertoire.
Easy to do, but makes a very firm edge that can easily become too tight or, in contrast, leave long loops of yarn between stitches once they have been worked. Also, these stitches will easily fall off the needle.
Characteristics: Easy to do, can be difficult to get correct tension.
Good for: Casting on a few stitches above a thumb gusset or for other garment shaping.
A stretchy cast on that’s perfect for edges using a knit one, purl one ribbing.
Characteristics: Very stretchy, creates a neat edge on ribbing that stretches as far as the ribbing will allow.
Good for: Any knit one, purl one ribbed cuff, such as on socks, mittens, or sweater hems.
Used when you want to be able to create “live” stitches on your cast on edge after working the rest of the piece so you can pick them up and work in the other direction.
Characteristics: A cast on you’ll never know was there.
Good for: two-way shawls, closed circles like hatbands, or unusual sweater constructions.
Used to create a provisional cast on where both edges are immediately worked to create a closed tube.
Characteristics: An invisible two-sided start to a closed tube.
Good for: toe-up socks, top-down hoods, or tubular scarves.
Return to How to Knit index:

Hi! I’m Talena Winters (a.k.a. the Yarn Mermaid).
I started My Secret Wish Knitting in 2010 to empower and delight knitting heroes like you who want to elevate your knitting and make magic with yarn. When I’m not concocting new yarn potion recipes, I’m creating story magic as a fantasy and romance author and fiction editor (at talenawinters.com). I live with my family and pets in the Peace Country of northern Alberta, Canada, where sweater weather lasts at least nine months a year and my closest neighbours are bears and wood nymphs.
This website is a labour of love by a team of one (me!). If you found value here, please support the effort by purchasing a pattern. If you want more knitting magic, check out my community events and newsletter in the Knitting Circle. We’d love to have you!